How to Create Beautiful Garden Borders: Tips and Inspiration
Garden borders do the quiet heavy lifting in your yard. They frame your beds, keep plants in line, and make everything look intentional—even when you’re winging it. Think of them as the eyeliner of landscaping: subtle, flattering, transformative.
Ready to sharpen those edges and give your garden a glow-up?
Why Garden Borders Matter (More Than You Think)
Borders keep grass from sneaking into beds, stop mulch from escaping, and guide the eye around your space. They also create structure, which makes even wild planting styles look curated. And yes, they can boost curb appeal fast.
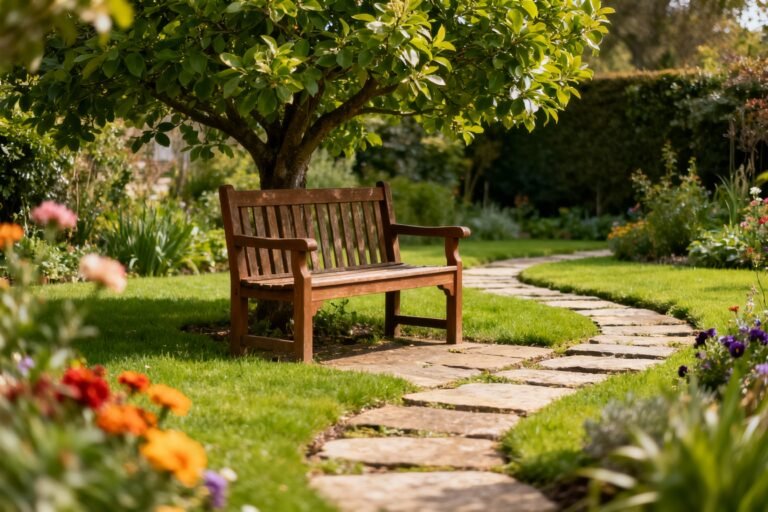
A simple border can make your garden look finished in a single afternoon.
Choosing the Right Border Material
The best border fits your style, budget, and how much maintenance you can tolerate. Let’s break down the greatest hits.
Classic and Low-Key: Metal Edging
Metal edging (steel or aluminum) creates a crisp, modern line. It’s thin, durable, and bends into smooth curves.
You can mow right over it, which keeps the lawn tidy without extra trimming. Downsides? It can be pricey, and steel may patina (which I love, but FYI).
Warm and Natural: Wood
Wood feels cozy and cottagey.
Think cedar, redwood, or pressure-treated lumber for longevity. You can stack sleepers for raised edges or install simple stakes with planks for a subtle frame. Just know wood weathers, so plan for maintenance or embrace the rustic look, IMO.
Charming and Affordable: Brick and Pavers
Bricks offer endless patterns—soldier, herringbone, basketweave—and they add a timeless vibe.
Set them flat for a mow-over edge or stand them on end for more definition. They do require a solid base, though, so don’t skip the compacted sand and edging restraint unless you enjoy wobbly bricks.
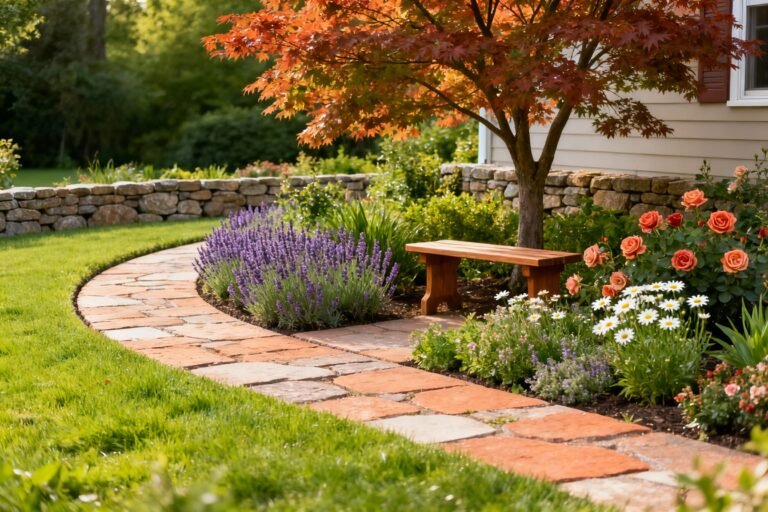
Stone for the Statement Makers
Natural stone screams “I have taste,” even if you scored it secondhand. It blends beautifully with informal plantings and cottage gardens.
Dry-stacked stone looks great and lets water drain, but it takes patience and some puzzle-solving. The result? Chef’s kiss.
Easy-Install: Plastic and Rubber
Flexible, inexpensive, and fast to install.
Recycled rubber options are eco-friendlier and more durable than the flimsy stuff. These can look tidy, but they won’t wow anyone. They’re the “I need a border by dinner” solution.
Designing Borders That Actually Work
Borders do more than contain mulch.
They define pathways, emphasize focal points, and make your garden easier to navigate. Before you buy anything, walk your space and sketch ideas. No art degree required.
Curves vs.
Straight Lines
Curves feel organic and soften hardscapes. They suit informal gardens, sweeping lawns, and cottage-style plantings. Straight lines match modern homes and narrow spaces, making beds look sleek and intentional.
Mix both to guide movement: straight along paths, soft curves around planting groups.
Scale Matters (A Lot)
A tiny border around a big bed looks shy. Match the height and thickness of the edging to the scale of the planting. Tall perennials?
Go beefier. Low groundcovers? Keep it subtle.
As a rule, your border should echo the visual weight of the plants behind it.
Color and Texture
Metal gives clean shadow lines. Brick adds warmth. Stone brings texture and a “grown here” vibe.
Choose a material that complements existing elements like your facade, walkway, or fence. Consistency makes your yard feel cohesive, not chaotic.
Installation Basics (Don’t Skip These)
Good installation equals long-lasting performance and less headache later. Do it right once, and future-you will high-five present-you.
- Mark your edge: Use a hose or rope to lay out curves.
Adjust until it feels right.
- Dig a trench: Most edging sits in a shallow trench—check the product depth. Keep it even.
- Base matters: For bricks and pavers, add 2–3 inches of compacted paver base and a thin sand layer. No shortcuts.
- Set and secure: Use spikes for metal and plastic, landscape adhesive or tight joints for stone and brick.
- Mind the grade: Keep the top of the border just above soil level to stop grass from creeping over.
- Finish clean: Backfill, tamp, and water gently to settle everything in place.
Pro Tip: Make It Mow-Friendly
If you hate string-trimming (who doesn’t), install borders flush with the lawn edge.
Bricks set flat or sturdy metal edged slightly proud of the turf lets the mower’s wheel ride right on it. It’s a small tweak with big payoff.
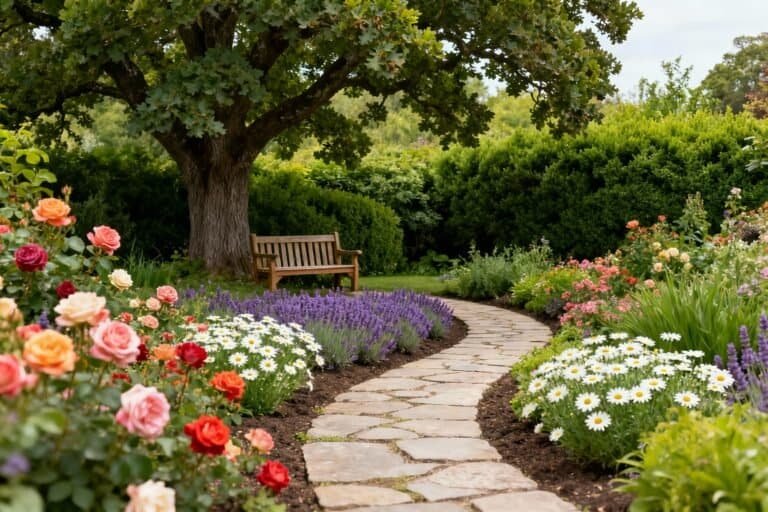
Planting the Perfect Border Bed
A border isn’t just the edge—it frames plants that tell the story. Layering creates depth and harmony.
- Front-row charmers: Low growers like thyme, lamb’s ear, or dwarf hosta soften edges.
- Mid-height structure: Think salvias, nepeta, heuchera, or dwarf grasses.
- Backbone plants: Taller perennials or shrubs provide height and anchor the view—hydrangeas, coneflowers, or hollies work well.
- Seasonal hits: Tuck in bulbs, annuals, or edibles for surprises and color.
Chives along a path? Yes, chef.
Choose Plants for Your Conditions
No amount of edging will save plants that hate your soil or sun. Match plants to your site’s reality—full sun vs. shade, clay vs. sandy, dry vs. soggy. Healthy plants make your border look pro without trying, IMO.
Low-Maintenance Border Ideas
Want clean lines without constant fuss?
Build defensively.
- Use weed barriers smartly: Landscape fabric under gravel borders helps, but avoid under planting beds unless you love root struggle.
- Choose permanent materials: Metal, brick, and stone outlast plastic and wood.
- Mulch with purpose: A 2–3 inch layer keeps weeds down and soil happy. Refresh annually.
- Edging strip for lawns: A 4–6 inch gravel or paver strip inside the bed stops grass invasion. It’s the moat your plants deserve.
Creative Border Ideas You’ll Actually Use
Want something different—but not weird-for-weird’s-sake?
Try these.
- Mixed materials: Metal edging with a brick cap along paths blends sleek and classic.
- Herb edging: Low hedges of lavender, rosemary, or boxwood smell great and look tidy.
- Reclaimed brick or stone: Save money, add character. Little imperfections = charm.
- Gravel ribbons: A narrow gravel strip between lawn and bed adds drainage and texture.
- Gabion mini-walls: Wire baskets filled with stone make bold, modern borders. Heavy-duty vibe, minimal upkeep.
Common Mistakes (And Easy Fixes)
We’ve all been there.
Let’s avoid the reruns.
- Wavy lines that weren’t meant to be wavy: Use a long board or rope to check your curve smoothness before you dig.
- Edging too shallow: Grass and mulch will jailbreak. Sink edging deep enough to block roots.
- Skipping the base for pavers: They’ll shift, tilt, and annoy you forever. Compact, then compact again.
- Too many styles at once: Pick one to two materials and repeat them.
Visual rhythm > chaos.
FAQ
What’s the cheapest border that still looks good?
Brick set flat in a simple soldier course offers great bang for your buck, especially if you find reclaimed material. Recycled rubber edging also works for a clean line on a tight budget. Keep the install neat, and you’ll get a tidy, finished look without spending a fortune.
How deep should I install edging to stop grass?
Aim for at least 4 inches below grade for tough turf.
For creeping grasses or aggressive runners, go 6 inches. Keep the top just above soil level to stop grass from hopping over.
Can I install metal edging myself?
Yes—basic tools and patience will get it done. You’ll need stakes, a mallet, a hand tamper, and a hacksaw or metal snips.
Pre-bend curves on the ground, set the trench, and spike it in. It’s a very achievable weekend project, FYI.
Do I need landscape fabric under my border?
Under the border itself, not usually. Under gravel pathways or gravel borders, yes—fabric helps stop weeds and keeps stones from sinking.
Avoid fabric under planting beds so roots can breathe and spread.
What border works best for sloped yards?
Terraced stone or stacked block borders handle slopes well and control erosion. For gentler grades, interlock pavers or taller metal edging with deeper stakes. Always step your border down the slope rather than forcing a straight horizontal line.
How do I keep mulch from washing onto the lawn?
Use a border that stands at least 1–2 inches above soil level and switch to heavier mulch like shredded hardwood or fine gravel on slopes.
Adding a subtle inward slope to the bed helps catch runoff before it reaches the edge.
Wrapping It Up
Borders might be small, but they punch way above their weight. Pick the right material, scale it to your plants, and install it with care, and you’ll instantly level-up your garden’s look. Start with one bed, nail the details, and keep it cohesive.
Your plants will pop, your lawn will behave, and your neighbors will “just happen” to stop by—purely for research, IMO.