Raised Garden Beds DIY: Creative Designs for Any Backyard
You want juicy tomatoes, less back pain, and a garden that looks like you know exactly what you’re doing? Build raised garden beds. They warm up faster in spring, drain better, and keep weeds in check.
Plus, they make your yard look like a Pinterest board, but, you know, actually useful. Let’s get your DIY raised beds up and growing—without overcomplicating it.
Why Raised Beds Rock (and Who They’re For)
You control the soil. That means fewer weeds, better drainage, and no mystery clay ruining your root dreams.
You also get to plant earlier because raised beds warm up faster than in-ground plots. Got a small yard, bad soil, or only a patio? Raised beds still work.
You can size them to fit any space. IMO, raised beds give new gardeners the biggest win-to-effort ratio.
Planning: Size, Location, and Materials
Start with size. Most folks go with 4′ wide so you can reach the middle without stepping in the bed. Length is flexible—8′ is common.
Depth? 10–12″ grows almost everything, but go 16–18″ if you want deep-rooted crops or easier kneeling. Location matters. Choose a spot with 6–8 hours of sun.
Avoid low spots where water sits. Keep it near a water source because hauling a hose across the yard gets old fast. Materials?
You’ve got options:
- Cedar or redwood: Naturally rot-resistant, long-lasting, pricier.
- Untreated pine: Affordable, lasts 4–6 years, great starter choice.
- Composite boards: Durable, modern look, cost more.
- Metal beds: Sleek, long-lasting, easy to assemble, can heat up a bit in hot climates.
- Reclaimed materials: Totally fine if clean and untreated (skip railroad ties and mystery pallets).
What About Pressure-Treated Wood?
Modern pressure-treated lumber uses copper-based preservatives, not the old scary stuff. FYI, most gardeners use it safely with a liner between soil and boards. If that still makes you nervous, choose cedar and sleep like a baby.
Tools and Supplies (Keep It Simple)
You don’t need a workshop. You need:
- Drill/driver and exterior screws (deck screws work)
- Saw (or have the store cut boards)
- Square and tape measure
- Level
- Staple gun (for lining, optional)
- Weed barrier or cardboard
- Soil mix (more on that below)
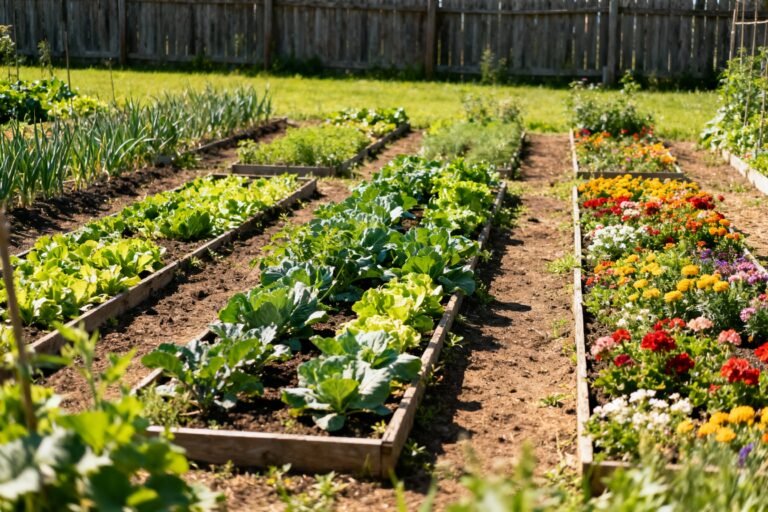
Build It: A No-Nonsense Raised Bed
Let’s say we’re making a classic 4′ x 8′ bed at 12″ high.
Here’s the quick build:
- Cut boards: Four 2x12s—two at 8′, two at 4′. Add 2×2 or 2×4 corner posts cut to 12–16″ if you want extra strength.
- Assemble the frame: Pre-drill and screw corners together. Use corner posts inside for stability.
- Level the site: Scrape the ground flat-ish.
Perfection not required.
- Place and square: Set the frame, check corners with a square or measuring diagonals.
- Weed control: Lay down cardboard or weed fabric inside the frame. Overlap seams by 6″.
- Fill with soil mix: Leave an inch or two from the top. Water to settle, then top up if needed.
Done.
You just built a garden that looks like you have your life together.
Optional Upgrades
- Rabbit or vole guard: Hardware cloth under the bed, stapled to the bottom of the frame.
- Corner caps: Little trim pieces make it look fancy with zero effort.
- Simple trellis: Add T-posts and wire mesh to the north side for peas, cucumbers, or tomatoes.
The Best Soil Mix (Don’t Overthink It)
You want loose, rich, well-draining soil. Here are three reliable options:
- Simple Mix: 60% high-quality topsoil, 30% compost, 10% coarse sand or perlite.
- “Mel’s Mix” (popular): 1/3 peat moss or coco coir, 1/3 compost, 1/3 vermiculite.
- Bagged shortcut: Mix garden soil with compost at a 2:1 ratio. Add perlite for drainage.
Aim for 5–7% organic matter and a slightly acidic pH (6.0–7.0) for most veggies. FYI, peat moss lowers pH; lime can nudge it back up.
If your soil compacts when wet, add more compost and perlite. If water runs through too fast, add more compost and a touch of coir.
How Much Soil Do I Need?
Use this quick math: Length x Width x Depth = Volume. For a 4′ x 8′ x 1′ bed, that’s 32 cubic feet.
Divide by 27 to get cubic yards: ~1.2 yards. Order 1.3–1.5 yards to account for settling if you’re using loose bulk material.
What to Plant and How to Layout
Think in zones. Tall plants on the north side so they won’t shade the rest.
Herbs along edges for easy snips. Root crops where the soil is deepest and loosest. Great raised bed crops:
- Easy wins: Lettuce, spinach, radishes, bush beans, herbs.
- Summer stars: Tomatoes, peppers, cucumbers (trellis), zucchini (one plant can feed a village, fair warning).
- Roots: Carrots, beets, turnips—raised beds make them happy.
- Companions: Marigolds and nasturtiums for pest deterrence and pollinator love.
Spacing Without the Guesswork
Try grid gardening:
- Divide your bed visually into 1′ squares with twine.
- Plant by square: 16 carrots, 9 beets, 4 lettuce, 1 pepper or tomato per square (tomatoes need support).
It keeps things tidy and maximizes yield.
Also, it looks satisfying. Like organizing your apps by color.
Watering, Mulch, and Maintenance
Raised beds drain well, which also means they dry out faster. Water deeply 2–3 times a week, more during heatwaves.
Morning watering helps prevent disease. Mulch saves sanity. Add 1–2″ of straw, shredded leaves, or pine bark to lock in moisture and block weeds. Mulch reduces watering by 30–50% in summer and it looks neat.
Maintenance to-do list:
- Top-dress with compost each season (1–2″).
- Pull weeds when tiny; don’t wait for the boss-level weeds.
- Rotate crops annually to reduce pests and disease.
- Stake plants early. Wrestling a floppy tomato in July is a comedy you don’t want to star in.
Easy Irrigation Upgrade
Install a simple drip system:
- Attach a timer to your spigot.
- Run 1/2″ mainline to the bed.
- Use 1/4″ drip lines or soaker hoses across the bed.
Set it and stop stress-watering at 9 p.m. in flip-flops.
Budget-Friendly Hacks
Want to save cash without building a wobbly mess? Try these:
- Use construction “cull” lumber: Home centers discount boards with cosmetic flaws.
Great for garden beds.
- Cardboard sheet mulch: Free from appliance stores. Blocks weeds like a champ.
- Layer fill: Logs, branches, and sticks at the bottom (hugelkultur style), then leaves, then soil. Cuts soil cost and improves moisture retention.
- Community compost: Many cities sell compost cheap.
Test a small batch first for quality.
FAQ
How deep should a raised bed be?
Most vegetables thrive in 10–12″ of soil. Root crops and potatoes appreciate 16–18″. If you only have 6–8″, you can still grow greens and herbs just fine.
Do I need to line my raised bed?
You don’t need to, but lining helps.
Use landscape fabric along the sides to protect wood and cardboard on the bottom for weed suppression. If you have burrowing pests, add hardware cloth under everything.
What’s the best wood for raised beds?
Cedar and redwood last longest and look great. Untreated pine is affordable and works well for several seasons.
Pressure-treated lumber is acceptable with a barrier, but many gardeners stick with cedar or pine for peace of mind.
Can I put a raised bed on concrete or a patio?
Yes. Build the frame, lay landscape fabric on the bottom, and fill with a good soil mix. Consider deeper sides (12–18″) and add rolling casters only if you enjoy moving 1,000 pounds of soil.
Spoiler: you don’t.
How do I prevent weeds in raised beds?
Start clean with cardboard or fabric, use quality soil, and mulch the surface. Pull invaders early. Weeds hate consistent mulching and love procrastination—don’t give them the satisfaction.
How long will my bed last?
Cedar can last 8–12 years or more.
Pine usually lasts 4–6. Metal and composite can go a decade plus. Keep soil away from constant wood contact with a liner to extend life.
Conclusion
Raised garden beds make growing food easier, cleaner, and way more fun.
You get healthier plants, less bending, and a garden that feels organized instead of chaotic. Build one this weekend, toss in a few tomatoes and herbs, and by summer you’ll wonder why you didn’t do it sooner. FYI, homegrown cherry tomatoes taste like candy—don’t say I didn’t warn you.