No-Bake Peanut Butter Cookie Dough Bars: Irresistible No-Oven Snack
I know cookies meet candy bar energy when you’re craving something sweet but easy. No-bake Peanut Butter Cookie Dough Bars are the answer to that temptation—soft, chewy, and ready in a snap. No oven, no fuss, just peanut butter vibes and a little crust that actually holds together. FYI, this is the kind of snack you whip up for movie night, chaotic study sessions, or when you realize you’ve eaten half a bag of pretzels and need a reset.
What makes these bars so addictive
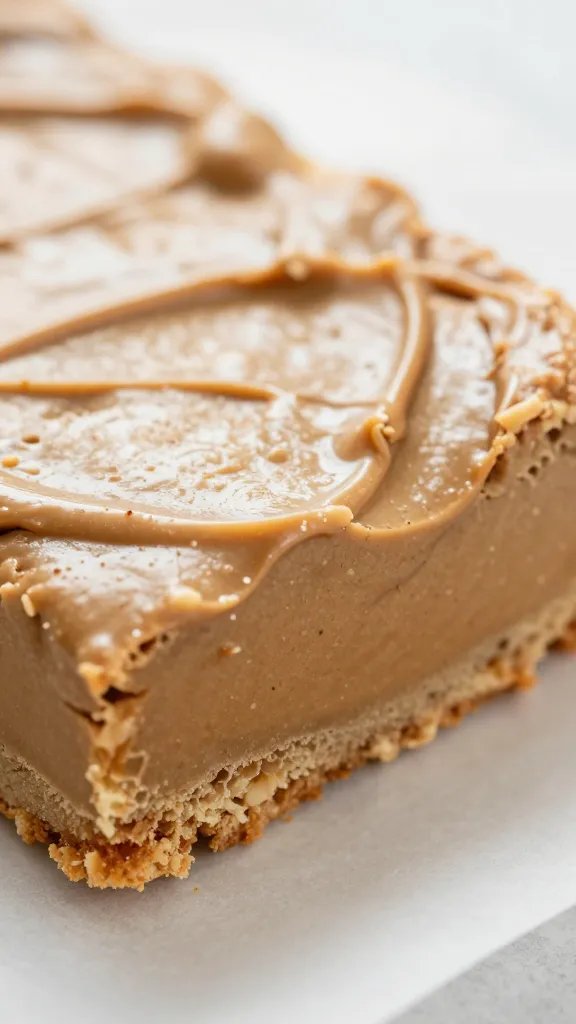
Short answer: texture and flavor. You get a sandy-crisp crust that gives way to a creamy, rich cookie-dough center. That combination hits multiple cravings at once: salty, sweet, and a little bit of bite. Do you really need chocolate chips wrapped in each bite? Absolutely. Do you need to heat the kitchen to enjoy them? Nope. That’s the magic here.
Gather your ingredients without drama
This recipe is friendly to the pantry hoarder in you. You almost certainly have most of these sitting in reach-at-hand proximity.
- Peanut butter (creamy or crunchy, your call)
- Powdered sugar for sweetness without the grit
- Old-fashioned oats or quick oats for texture
- Butter or coconut oil to bind everything
- Vanilla extract for depth
- Milk or plant-based milk to loosen if needed
- Optional mix-ins: chocolate chips, crushed peanuts, a pinch of salt
Step-by-step: how to assemble without breaking a sweat
I’m all about processes that feel like cheating, but in the nicest possible way. Here’s a straightforward flow so you don’t overthink it.
- Mix the “crust” tier: In a bowl, stir together oats, a little powdered sugar, melted butter or coconut oil, and a splash of milk. The goal is a crumbly, light mixture that presses into a pan without crumbling apart.
- Press into your pan: Line a dish with parchment. Press the crust down evenly with the back of a spoon or your clean hands. It should feel like a compact, slightly craggy cookie base.
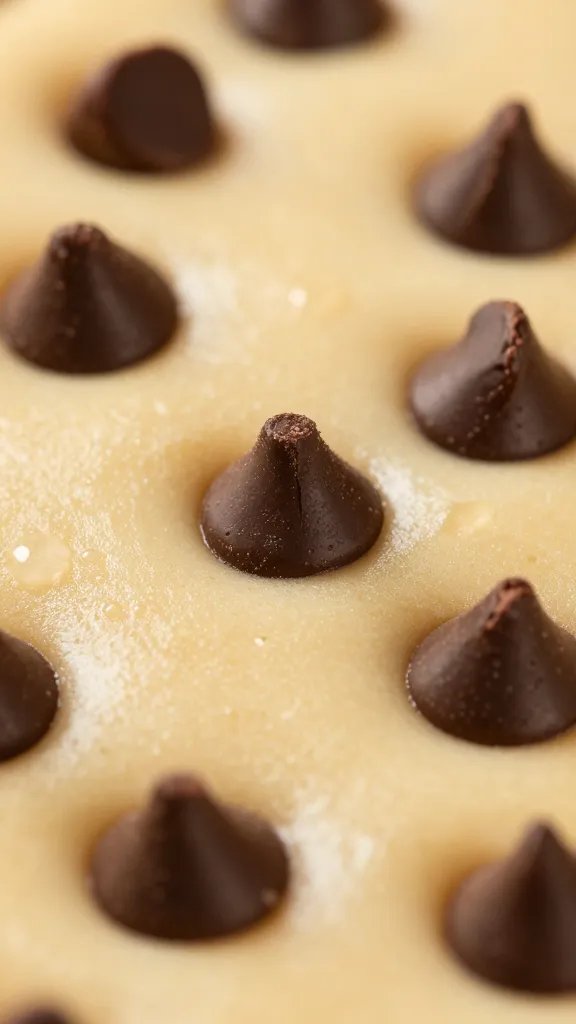
- Make the cookie-dough center: In another bowl, blend peanut butter, more powdered sugar, vanilla, and a touch of milk until smooth and scoopable. Add chips or nuts if you’re into texture chaos (in the best way).
- Spread and swirl: Dollop the cookie-dough center onto the crust. Use a spatula to spread it evenly, then swirl in extra chips or a drizzle of melted chocolate if you’re feeling fancy.
- Chill until firm: Slide the pan into the fridge for at least 1–2 hours. Yes, patience is part of the recipe, but it’s quick chill time, not a full bake.
- Slice and serve: Lift the bar out using the parchment, cut into bars, and admire your work. Pro tip: wipe your knife between cuts for clean edges.
Texture talk: what you’ll actually taste
If you’re wondering about the feel of these bars, here’s the honest lowdown. The crust is sturdy enough to hold a bite without crumbling, yet soft enough to compress under your molars. The center tastes like cookie dough—creamy, peanut-forward, with a whisper of vanilla and sugar. It’s not overly甜; the balance leans into snack territory rather than dessert-only hero.
Flavor variations to tailor to your mood
Because life is too short for boring snacks, here are some easy twists you can try next time.
Salted peanut perfection
Add a pinch more salt to the crust and a light sprinkle on top after slicing. The contrast makes the peanut butter pop.
Choco-mad version
Fold in mini chocolate chips into the dough and drizzle a little melted dark chocolate over the top before chilling. FYI, chocolate makes everything feel indulgent.
Oat-alternative textures
Swap in crushed pretzels or toasted coconut for a different crunch and aroma. It’s amazing how much a tiny change can transform the bite.
Make it your own: dietary-friendly tweaks

These bars are forgiving, and you can bend them to fit your needs.
- Gluten-free option: Use certified gluten-free oats and make sure you’re using gluten-free peanut butter if that matters to you.
- Vegan version: Use vegan butter or coconut oil and a plant-based milk. Check your powdered sugar label to ensure it’s vegan-friendly.
- Lower-sugar approach: Go lighter on the powdered sugar and let the natural sweetness from peanut butter shine. You might add a drizzle of honey or maple syrup if you want a touch more moisture.
Storage, freshness, and keeping them legit
No one wants a soggy bar disaster in the fridge. Here’s the practical scoop.
- Store in an airtight container in the fridge for up to a week. They firm up a bit in the cold, which some people love and others miss the gooey center—adjust by letting them soften a few minutes before eating.
- You can freeze them for longer storage: wrap individual bars, freeze, and thaw a few minutes before munching. It’s basically single-serving snacking on demand.
- Keep away from strong-smelling foods in the fridge. Peanut butter armor is sensitive to strong odors, and we don’t want a lemony surprise in your dough.
Common missteps (so you don’t fall into the trap)
We all mess up a recipe once in a while. Here are the classic blunders and how to dodge them.
Crumbly crust?
Too little moisture = crumble city. Add a touch more melted butter or a splash of milk. Aim for a cohesive, pressable crumb.
Doughy center that won’t set?
If the center stays soft, give it a longer chill, or add a touch more powdered sugar to firm things up. Don’t rush the fridge; patience = texture victory.
Too sweet or not peanut-buttery enough?
If the balance tips, adjust by adding a pinch of salt or a little more peanut butter to bring back the melting point. It’s a quick save.
FAQ
Can I bake these instead of chilling?
No-bake vibes are the thing here. Baking changes the texture completely, and you’ll miss that creamy, doughy center. If you insist on oven time, try a different cookie bar recipe designed for baking.
What if I don’t have powdered sugar?
Powdered sugar smooths the dough. If you’re out, you can try a touch more granulated sugar, plus a splash of milk and a quick whip of the peanut butter to help it emulsify. It won’t be exactly the same, but it’ll still taste delish.
Can I double this recipe?
Yes, and you should. Doubling is straightforward: scale both crust and center, keep the same ratios, and press into a larger pan. Just watch your fridge space, friend.
Is it okay to use natural peanut butter with the oil separation?
Totally. Stir the oil back in first so your dough isn’t greasy. It might feel a touch looser, but you’ll still get that creamy mouthfeel.
How long do these stay chewy?
A few days in the fridge, and they stay tasting good. If you’re counting on them lasting longer, freeze them in portions. The texture stays enjoyable, and you won’t risk a stale bite.
Conclusion
No-Bake Peanut Butter Cookie Dough Bars are the snack you want when you’re craving something semi-healthy, deeply comforting, and incredibly easy. They hit the sweet spot between dessert and a grab-and-go treat. IMO, they’re the little black dress of treats: simple, versatile, and there for you anytime. So whip up a batch, share them with friends (or don’t, we won’t judge), and revel in that perfect balance of chewy-dream and nutty goodness. FYI, your future self will thank you for discovering the magic of no-bake glory.