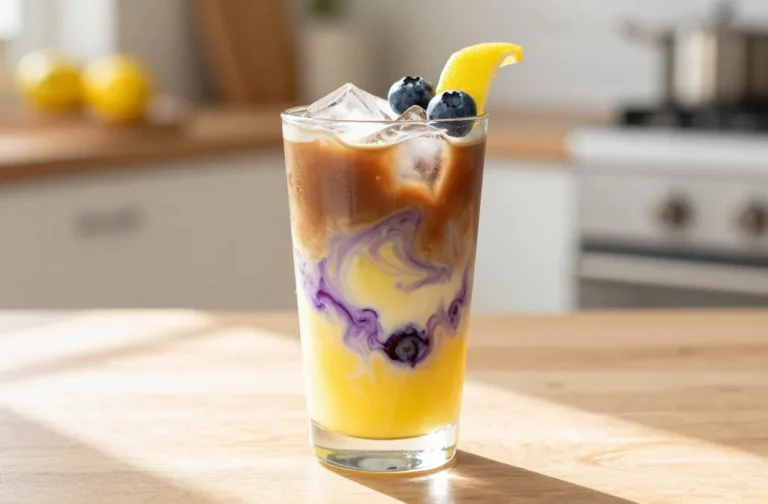
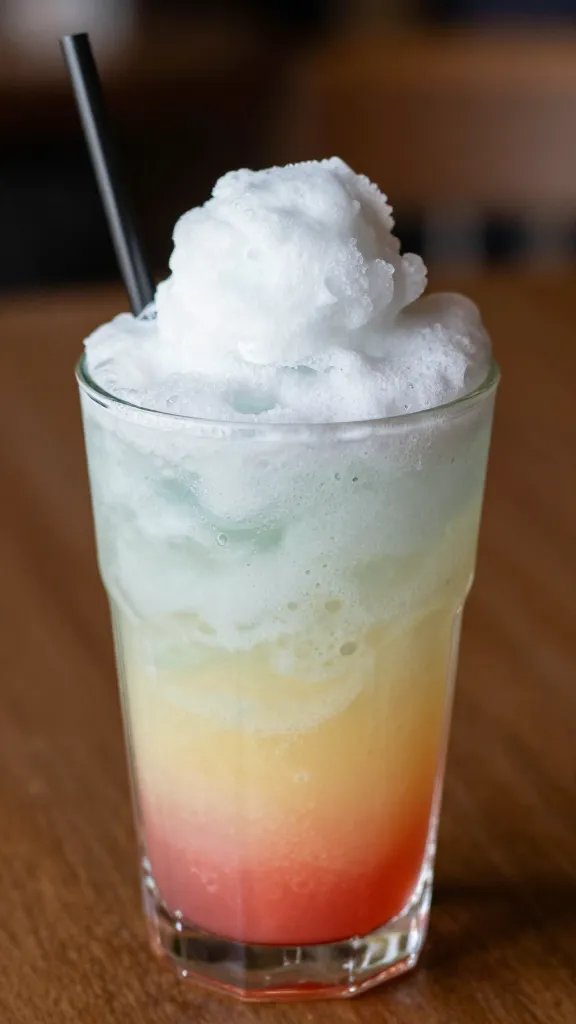
Taste the Tropics with Rainbow Island Freeze Mocktail Recipe
Tired of the same old fizzy water or lukewarm iced tea? Your taste buds are screaming for an adventure, and honestly, who can blame them? Get ready to ditch the dull and dive headfirst into a kaleidoscope of flavor with the Rainbow Island Freeze Mocktail. This isn’t just a drink; it’s a vibrant, frosty escape to a tropical paradise, all from the comfort of your kitchen.
The Vibe Check: Why This Mocktail is Your New Best Friend
Let’s be real, sometimes you just need a little *oomph* in your day, a splash of joy that doesn’t come with a side of regret or a morning-after headache. That’s where the Rainbow Island Freeze sails in, a beacon of vibrant, non-alcoholic deliciousness. It’s the kind of drink that makes you feel like you’ve just won the lottery, even if your biggest win today was finding matching socks.
Ditching the Dull: A Colorful Rebellion
Think about it: most mocktails are, well, a bit… beige. They often feel like an afterthought, a consolation prize. Not this one. The Rainbow Island Freeze is a full-blown celebration, a rebellious act against bland beverages. It’s visually stunning, tasting even better than it looks, and it screams, “I’m here to have a good time, and I don’t need alcohol to do it!” Who needs a plane ticket when you have a blender and some fruit, right?
Gathering Your Rainbow: The Ingredient Lowdown
Building a rainbow isn’t rocket science, but it does require some strategic fruit choices. We’re aiming for distinct color layers, so think vibrant, natural hues. Don’t skimp on quality here; fresh fruit truly makes all the difference. IMO, frozen fruit is your secret weapon for that perfect frosty texture without watering down the flavor.
The Berry Brigade: Flavor & Color Powerhouses
These are your heavy hitters, providing both stunning color and incredible taste. Make sure they’re nice and cold, preferably frozen solid.
- For Red/Pink: 1 cup frozen strawberries or raspberries (or a mix!).
- For Orange/Yellow: 1 cup frozen mango chunks or peaches.
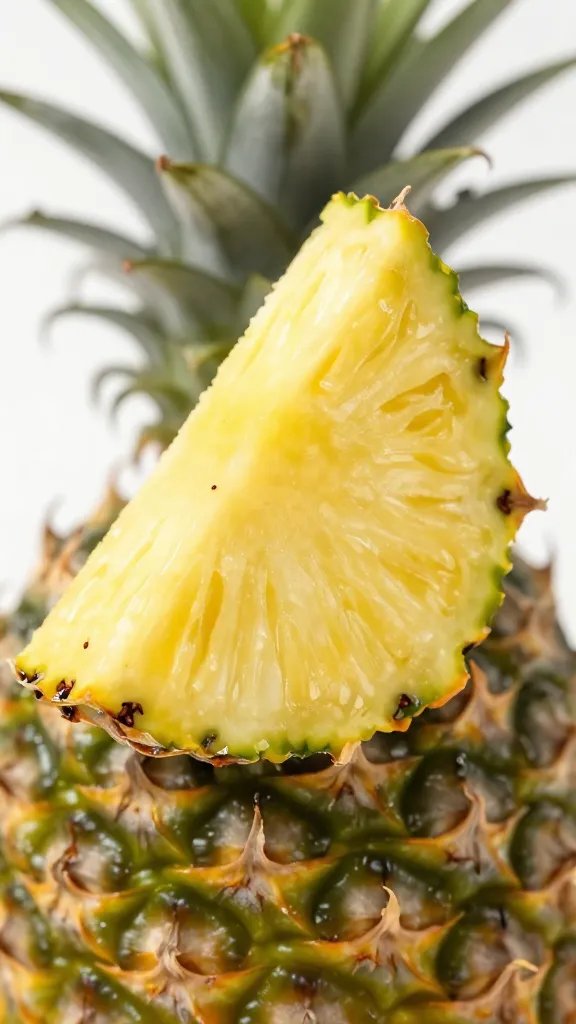
- For Green: 1 cup frozen pineapple chunks and a handful of fresh spinach (trust me, you won’t taste it, but the color is *chef’s kiss*).
- For Blue/Purple: 1 cup frozen blueberries or blackberries.
Tropical Twists and Zesty Kicks
These are the supporting actors that elevate our mocktail from good to legendary. They bind the flavors and give it that unmistakable island vibe.
- Liquid Base: 1 cup coconut water or pineapple juice (divided, about 1/4 cup per layer).
- Sweetener (Optional): 2-3 tablespoons honey, agave nectar, or simple syrup (adjust to your fruit’s sweetness and your preference).
- Zing Factor: 1 lime, juiced. A little acidity really brightens things up.
- Garnish Game: Fresh mint sprigs, lime wedges, tropical fruit slices (pineapple, kiwi), or even edible flowers.
The Magic Unfolds: Step-by-Step Assembly
Okay, deep breaths. This isn’t complicated, but it does require a tiny bit of patience and a good blender. Think of yourself as a mad scientist, but instead of explosions, you’re creating deliciousness.
- Prep Your Layers: Divide your liquid base (coconut water or pineapple juice) into four separate small bowls, about 1/4 cup each. Do the same with your sweetener if using.
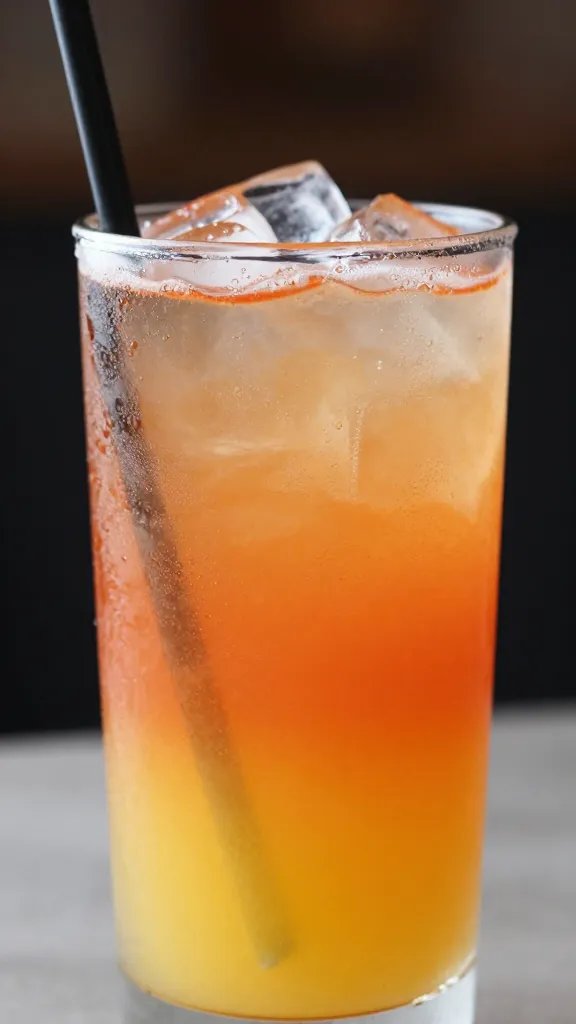
- Red/Pink Layer First: In your blender, combine the frozen strawberries/raspberries, 1/4 cup of your chosen liquid base, and a squeeze of lime. Blend until completely smooth and slushy-like. If it’s too thick, add a tiny splash more liquid. If it’s too thin, add a few more frozen berries. Pour this vibrant red layer into the bottom of your serving glass. Pop the glass into the freezer for about 10-15 minutes to let it firm up slightly. This is key for distinct layers!
- Orange/Yellow Layer: While the red layer chills, rinse your blender. Add the frozen mango/peaches, another 1/4 cup liquid base, and a squeeze of lime. Blend until smooth. Carefully spoon this orange layer on top of the chilled red layer. Back to the freezer for another 10-15 minutes.
- Green Layer: You know the drill! Rinse the blender. Combine the frozen pineapple, a handful of spinach (don’t be scared!), 1/4 cup liquid base, and a squeeze of lime. Blend until perfectly green and smooth. Gently spoon over the orange layer. Freezer time again!
- Blue/Purple Layer: Last one! Rinse the blender. Add the frozen blueberries/blackberries, the final 1/4 cup liquid base, and a squeeze of lime. Blend until a beautiful blue or purple. Carefully top off your mocktail.
- The Grand Finale: Give your masterpiece a final 5-10 minutes in the freezer to ensure everything is perfectly frosty.
Layering Like a Pro (Without the Pressure)
The secret to those stunning, distinct layers is simple: chill between each addition. It doesn’t need to be rock solid, just firm enough that the next layer doesn’t immediately bleed into it. A spoon is your best friend here; gently pour or spoon each new color over the back of a spoon held just above the previous layer. This slows the flow and prevents splashing. You’ve got this!
The Freeze Factor: Patience is a Virtue (Mostly)
I know, I know. Waiting is the hardest part when deliciousness is involved. But those 10-15 minute freezer breaks are non-negotiable for that picture-perfect rainbow effect. Think of it as forced mindfulness. Or, you know, just scroll through social media while you wait. Your call.
Pro Tips & Tricks for Mocktail Mastery
You’ve made a fantastic mocktail, but why stop there? Let’s take it from great to “OMG, you *have* to try this!” with a few extra flourishes.
Garnish Game Strong
A mocktail this beautiful deserves a proper send-off. Don’t just plop it down naked.
- Fresh Mint: A sprig of mint adds a pop of green and a refreshing aroma.
- Lime Wheel/Wedge: Classic, simple, and always looks good.
- Tropical Fruit Skewer: Thread a small piece of pineapple, a kiwi slice, and a raspberry onto a fancy pick. Instant upgrade!
- Edible Flowers: For a truly elegant touch, a single edible orchid or pansy can transform your drink.
Customizing Your Color Palette
Feeling adventurous? You don’t have to stick to the exact fruits I listed.
- Yellow: Pineapple, passion fruit pulp, yellow bell pepper (just kidding, mostly!).
- Orange: Carrots (again, maybe not for a mocktail), oranges, apricots.
- Purple: Acai berries, purple grapes.
- Blue: Butterfly pea flower tea (steeped and chilled) can give you a natural blue! Add a tiny bit to a white base like coconut milk for a true blue layer.
Just remember to keep the fruit-to-liquid ratio consistent for that perfect slushy texture.
Beyond the Glass: Perfect Pairings & Occasions
This mocktail isn’t just for solo sipping (though, let’s be honest, it’s pretty great for that). It’s a party waiting to happen!
Serve it at your next backyard BBQ, a kid’s birthday party (they’ll think you’re a wizard), or a brunch where you want to impress without going overboard. It’s fantastic alongside light summer fare like grilled chicken salads, fish tacos, or even just a bowl of salty popcorn. The sweet, tangy, and refreshing notes cut through richness beautifully. FYI, it’s also a fantastic pick-me-up on a hot afternoon when you need a little mental vacation.
FAQ
Can I make this mocktail ahead of time?
You can definitely prep the individual fruit blends ahead of time! Blend each color separately and store them in airtight containers in the freezer. When you’re ready to serve, simply layer them into your glasses, chilling between each layer as instructed. Don’t assemble the full mocktail too far in advance, as the layers might start to melt and blend together, losing that distinct rainbow effect.
What if I don’t have fresh fruit?
No problem at all! This recipe is actually designed with frozen fruit in mind for the best slushy consistency. If you only have fresh fruit, you can chop it up and freeze it for a few hours before blending. Just ensure it’s fully frozen to achieve that frosty texture without needing to add a ton of ice, which can dilute the flavor.
How do I get the distinct layers?
The key to distinct layers is patience and temperature. First, ensure each blended fruit layer is thick and slushy, not watery. Second, and most importantly, pop your glass into the freezer for 10-15 minutes after adding each layer. This allows it to firm up just enough to support the next layer without immediately mixing. When adding the new layer, gently spoon or pour it over the back of a spoon to minimize disturbance.
Can I make this an alcoholic cocktail?
While this mocktail shines brightly on its own, if you’re looking to adult it up, you absolutely can! A splash of white rum, vodka, or even a fruit-flavored liqueur (like peach schnapps or blue curaçao for the blue layer) would integrate well. I’d suggest adding about 1 to 1.5 ounces of your chosen spirit *per layer* when blending. Experiment to find your perfect boozy balance!
What’s the best way to serve it for a party?
For a party, consider prepping all your individual fruit blends in advance and keeping them frozen. Set up a “build-your-own rainbow” station with the different colored purees, glasses, spoons, and a small cooler or bucket of ice to keep the glasses cool between layers. Provide fun garnishes like colorful straws, fresh fruit skewers, and mint. It makes for a fun, interactive experience and a stunning presentation!
Your Rainbow Awaits!
So there you have it, folks. The Rainbow Island Freeze Mocktail isn’t just a recipe; it’s an invitation to inject a little more joy, color, and deliciousness into your life. It’s proof that sometimes, the simplest things can bring the biggest smiles. Go forth, blend with confidence, and enjoy your very own vibrant escape. Your taste buds (and your Instagram feed) will thank you.