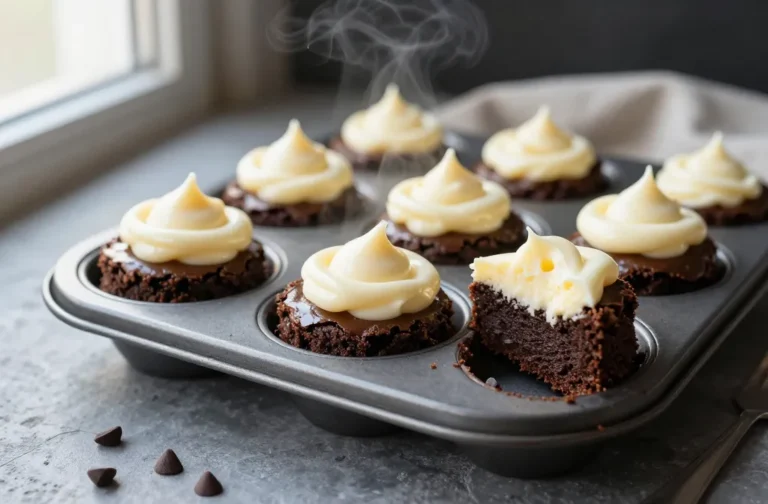
Perfect Vanilla Cupcakes Recipe
Forget the fancy, the flamboyant, the sprinkles-galore concoctions. We need to talk about vanilla cupcakes. Seriously. Everyone dismisses them as “basic,” but I’m here to tell you that a *perfect* vanilla cupcake is the ultimate test of a baker’s skill and a pure, unadulterated joy. It’s the little black dress of desserts – simple, elegant, and always in style.
The Unsung Hero: Why Vanilla Deserves Your Respect
Let’s be real, vanilla gets a bad rap. People call things “vanilla” when they mean boring or plain. But those people, frankly, are missing the point entirely. A truly great vanilla cupcake isn’t plain; it’s a symphony of subtle, comforting flavors that allows the quality of your ingredients to shine.
Think about it: when you strip away all the bells and whistles, what are you left with? Pure, unadulterated deliciousness. It’s an opportunity to appreciate the delicate sweetness, the tender crumb, and that unmistakable, warm aroma that only real vanilla can deliver. This isn’t just a cupcake; it’s a hug in paper form.
The Quest for Perfection: What Makes a Great Vanilla Cupcake?
Crafting the perfect vanilla cupcake isn’t rocket science, but it does require attention to detail. We’re aiming for a cupcake that’s moist, tender, and boasts a delicate crumb, not a dry, crumbly hockey puck. The secret lies in a few key ingredients and techniques, my friend.
Butter vs. Oil: The Great Fat Debate
For vanilla cupcakes, butter is king. While oil can give you a super moist crumb, butter provides that rich, complex flavor and helps with browning. We want that golden exterior and tender interior that only butter can deliver. Use unsalted butter, softened to room temperature – not melted, not hard as a rock.
The Secret Weapon: Buttermilk
If you’re not using buttermilk in your vanilla cupcakes, you’re missing out. Period. Buttermilk adds a subtle tang that balances the sweetness and, more importantly, reacts with the baking soda to create an incredibly tender, moist crumb. It’s like a magic potion for your baked goods. Don’t skip it!
Vanilla Extract: Go for Quality
This is a *vanilla* cupcake, right? So, for the love of all that is holy, invest in good quality pure vanilla extract. Not imitation vanilla. Not the stuff that smells like a candle. We’re talking about the real deal. A good quality vanilla bean paste can also work wonders, giving you those beautiful little flecks of vanilla bean. It’s the star of the show, so let it shine!
Gather Your Arsenal: The Ingredient List
Alright, let’s get down to business. Here’s what you’ll need to create these beauties. Measure everything accurately – baking is a science, after all!
- 1 ½ cups (190g) All-Purpose Flour: Sifted, please. It makes a difference.
- 1 ½ teaspoons Baking Powder: For lift!
- ½ teaspoon Baking Soda: To react with that glorious buttermilk.
- ½ teaspoon Salt: Balances the sweetness. Don’t skip it.
- ¾ cup (170g) Unsalted Butter: Softened to room temp.
- 1 ¼ cups (250g) Granulated Sugar: Sweetness, obviously.
- 2 Large Eggs: Room temperature, please.
- 2 teaspoons Pure Vanilla Extract (or Vanilla Bean Paste): The star!
- 1 cup (240ml) Buttermilk: Room temperature is key for a smooth batter.
Let’s Get Baking: Step-by-Step Instructions
Ready to make some magic? Follow these steps, and you’ll be a vanilla cupcake whisperer in no time.
- Preheat & Prep: Preheat your oven to 350°F (175°C). Line a 12-cup muffin tin with paper liners. This is non-negotiable, unless you like scrubbing pans for hours.
- Whisk Dry Ingredients: In a medium bowl, whisk together the sifted flour, baking powder, baking soda, and salt. Set this aside.
- Cream Butter & Sugar: In a large bowl (or stand mixer with the paddle attachment), beat the softened butter and granulated sugar on medium-high speed until light and fluffy, about 3-5 minutes. Scrape down the sides of the bowl often. This step incorporates air, which is crucial for a tender crumb.
- Add Eggs & Vanilla: Add the eggs one at a time, beating well after each addition until just combined. Then, stir in the pure vanilla extract. It’ll smell amazing already, I promise.
- Alternate Dry & Wet: With the mixer on low speed, gradually add about one-third of the dry ingredients to the butter mixture, mixing until just combined. Then, add half of the buttermilk, mixing until just incorporated. Repeat with another third of the dry ingredients, the remaining buttermilk, and finally the last third of the dry ingredients.
- Mix Just Until Combined: This is crucial. Stop mixing as soon as the last streaks of flour disappear.
- Fill Liners: Divide the batter evenly among the prepared cupcake liners, filling each about two-thirds full. An ice cream scoop works wonders for this.
- Bake: Bake for 18-22 minutes, or until a wooden skewer inserted into the center of a cupcake comes out clean. Don’t open the oven door too early, or your cupcakes might get sad and sink.
- Cool: Let the cupcakes cool in the muffin tin for 5 minutes before transferring them to a wire rack to cool completely. Frosting warm cupcakes is a recipe for a melty, sad mess.
Pro Tip: Don’t Overmix!
Seriously, I can’t stress this enough. Overmixing develops the gluten in the flour, leading to tough, chewy cupcakes. We want tender, fluffy clouds, not rubber balls. Mix *just* until the ingredients are combined. Your future self will thank you.
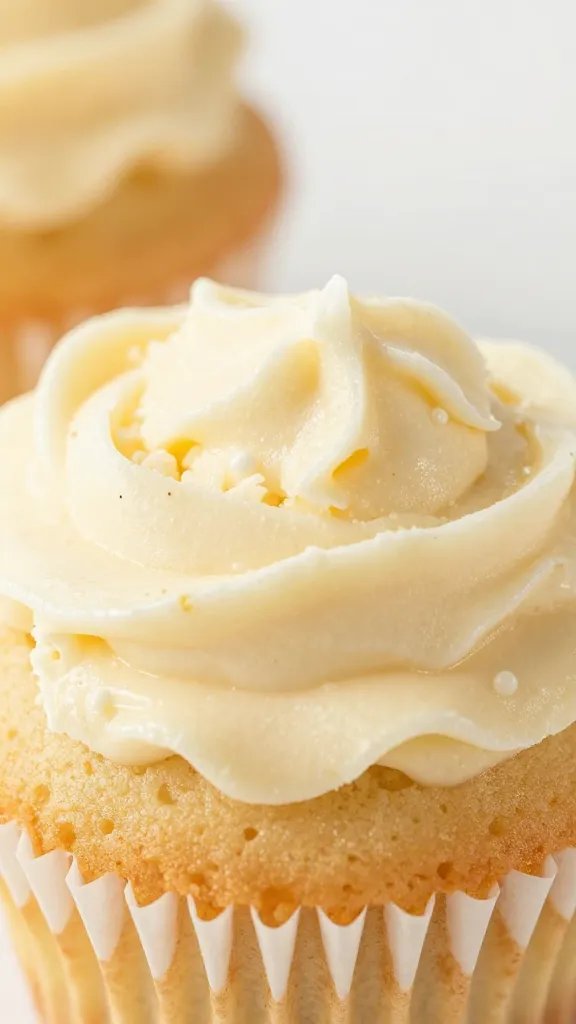
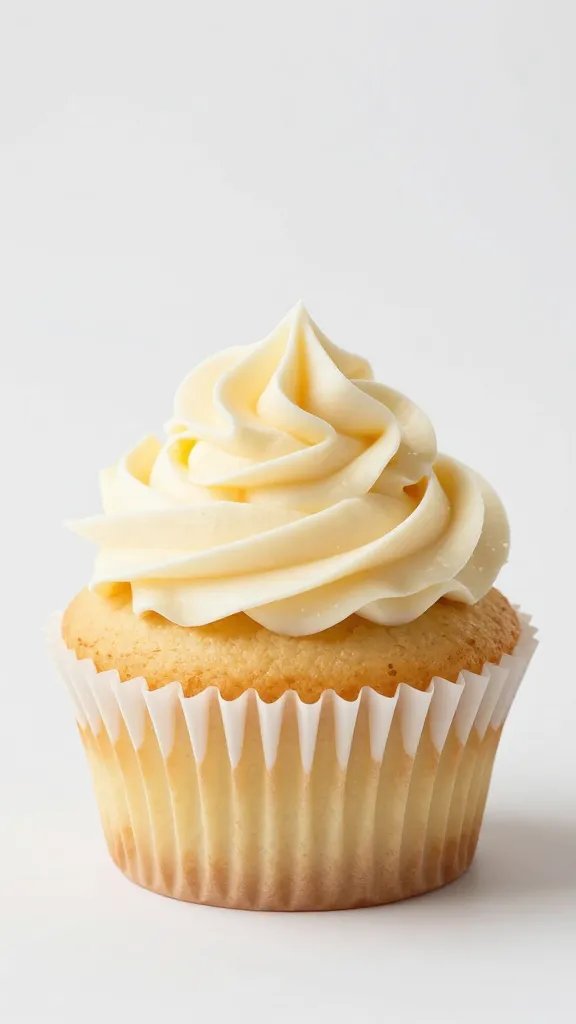
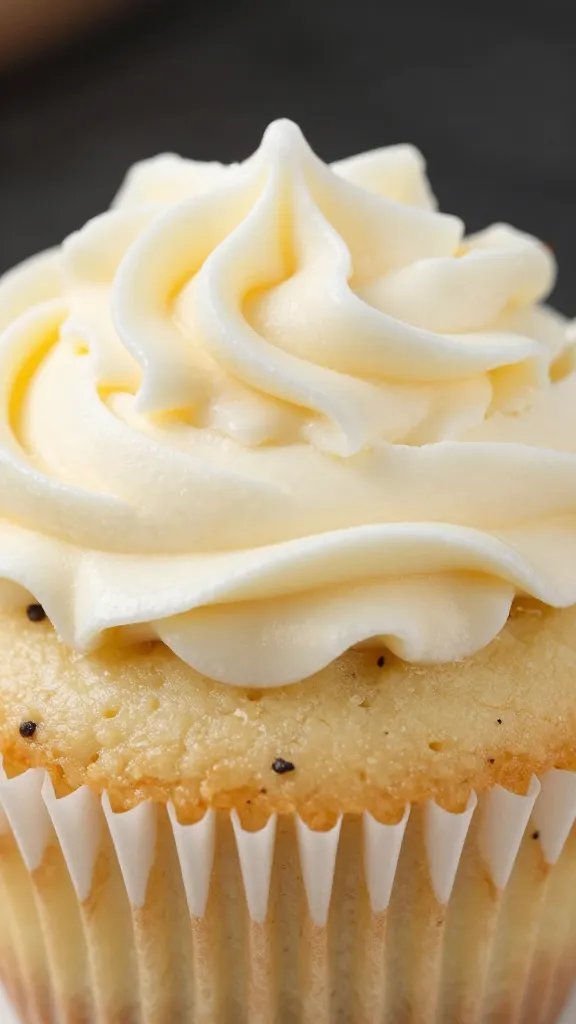
Frosting Fun: The Vanilla Bean Buttercream
While the cupcakes are the star, a good frosting is their best supporting actor. For these beauties, I highly recommend a classic Vanilla Bean Buttercream. It’s simple, elegant, and lets that vanilla flavor really sing.
Whip up some softened unsalted butter until fluffy, then gradually add powdered sugar, a splash of heavy cream or milk, and a generous amount of pure vanilla extract or vanilla bean paste. Beat until light and spreadable. Perfection!
Variations & Topping Ideas
Feeling a little wild? Once your vanilla cupcakes have cooled and are frosted, you can jazz them up:
- Sprinkles: Classic, colorful, always a win.
- Fresh Berries: A few raspberries or blueberries add a lovely pop of color and freshness.
- Toasted Coconut: For a subtle tropical vibe.
- Chocolate Shavings: Because chocolate and vanilla are a match made in heaven.
Troubleshooting Your Triumph: Common Cupcake Catastrophes
Even the best bakers run into snags. Here are a few common issues and how to fix ’em:
- Cupcakes Sinking in the Middle: Usually means they’re underbaked, or you opened the oven door too early. Make sure that skewer comes out clean!
- Dry Cupcakes: Overbaked, or too much flour/not enough wet ingredients. Get that oven thermometer checked, and measure accurately.
- Tough Cupcakes: You guessed it – overmixed batter. Be gentle!
- Flat Tops: Could be old leavening agents (baking powder/soda), or your oven temperature is off. Always check your leavening dates.
FAQ Section
Can I use regular milk instead of buttermilk?
You can, but I really don’t recommend it. Buttermilk contributes significantly to the tenderness and moisture of these cupcakes. If you absolutely can’t find buttermilk, you can make a DIY version: add 1 tablespoon of lemon juice or white vinegar to a measuring cup, then fill the rest with regular milk until you reach 1 cup. Let it sit for 5-10 minutes until it slightly curdles. It’s not quite the same, but it’s a decent substitute in a pinch.
Why are my cupcakes sinking in the middle?
This is usually a sign of underbaking. The structure isn’t fully set, so the middle collapses as it cools. Make sure to bake until a wooden skewer inserted into the center comes out clean. It could also happen if you open the oven door too early, letting cold air rush in and shock the delicate structure.
How do I store these cupcakes?
Store frosted vanilla cupcakes in an airtight container at room temperature for up to 2-3 days. If your frosting is cream cheese-based or contains fresh fruit, it’s best to refrigerate them. For longer storage, unfrosted cupcakes can be frozen for up to 3 months in an airtight container. Thaw them at room temperature before frosting.
Can I make these dairy-free or gluten-free?
Making them dairy-free is quite doable! Use plant-based butter (like Miyoko’s Kitchen or Earth Balance sticks) and a dairy-free buttermilk substitute (plant-based milk with lemon juice/vinegar). Gluten-free is a bit trickier but possible with a good quality 1:1 gluten-free baking flour blend that contains xanthan gum. You might need to adjust liquid slightly, so keep an eye on the batter consistency.
What’s the best way to get perfectly domed tops?
A few things contribute to those beautiful domes! First, make sure your leavening agents (baking powder and soda) are fresh. Second, don’t overmix the batter. Third, fill your cupcake liners about two-thirds full – too little and they’ll be flat, too much and they’ll overflow. Lastly, baking at the correct temperature (350°F/175°C) is key; too low and they won’t rise properly, too high and they’ll dome too quickly and then fall.
The Humble Perfection
So there you have it. The vanilla cupcake, often overlooked, but undeniably magnificent when done right. It’s not just a dessert; it’s a canvas for your baking skills, a testament to the power of simple, quality ingredients, and a pure delight for anyone lucky enough to take a bite. Go forth, bake these beauties, and reclaim the glory of vanilla!