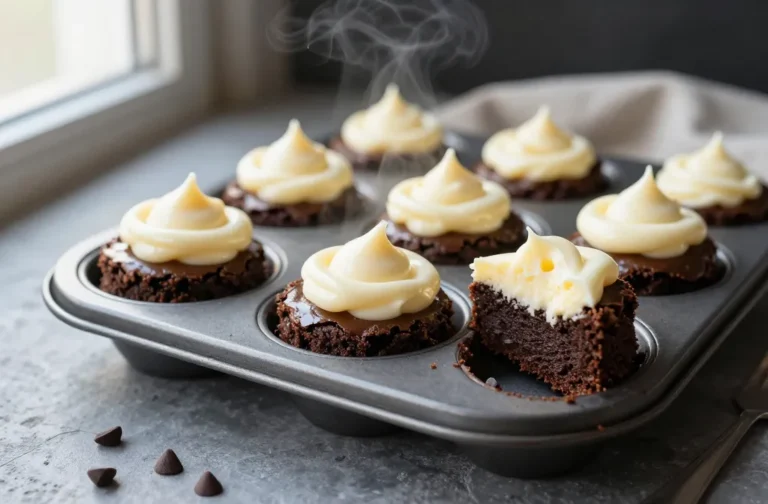
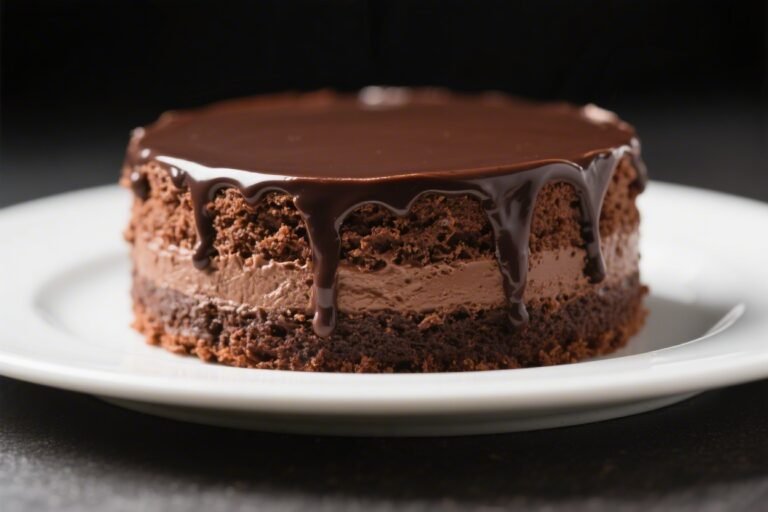
Meet the Bento Cake: The Tiny Dessert That’s Hijacking Birthdays (and Your Feed)
Think big flavor in a lunchbox-sized package. That’s the bento cake—cute, ultra-shareable, and dangerously craveable. It’s the dessert equivalent of a power suit in petite form: minimal waste, maximum flex.
Want a bakery-level cake you can finish in a day, decorate like a pro, and gift without awkward slicing? This is it. Compact, customizable, and yes, wildly photogenic.
Why You’ll Love This Recipe
- Perfectly portioned: One 4–5-inch cake feeds 2–4 people—no leftovers haunting your fridge.
- Faster than a full cake: Smaller layers bake and cool quickly, so you can go from batter to box in under two hours.
- Beginner-friendly decorating: Smooth sides are easier on small cakes, and piped messages look instantly pro.
- Budget-friendly gift: Costs a fraction of bakery prices but still looks luxe.
FYI, presentation is half the magic.
- Custom everything: Flavor the sponge, tint the buttercream, add fillings—make it your signature.
Ingredients Breakdown
- For the Vanilla Sponge (4–5-inch, two layers):
- 3/4 cup (90 g) all-purpose flour
- 1/2 cup (100 g) granulated sugar
- 1/2 tsp baking powder
- 1/4 tsp baking soda
- 1/4 tsp fine salt
- 1/4 cup (60 ml) neutral oil or melted unsalted butter
- 1 large egg, room temp
- 1/3 cup (80 ml) whole milk, room temp
- 1 tsp pure vanilla extract
- 1 tbsp sour cream or plain yogurt (for moisture)
- For the Vanilla Buttercream:
- 1/2 cup (113 g) unsalted butter, room temp
- 1 1/2 cups (180 g) powdered sugar, sifted
- 1–2 tbsp heavy cream or milk
- 1 tsp vanilla extract
- Pinch of salt
- Gel food coloring (optional)
- Optional Fillings & Decorations:
- 2–3 tbsp jam, lemon curd, or chocolate ganache
- Sprinkles, mini meringues, edible pearls
- Small piping tips for borders and lettering
- For the Bento Look:
- Parchment squares
- Kraft bento box or takeout-style cake box (4–6 inches)
- Twine or ribbon (optional but adorable)
The Method – Instructions
- Prep the pans: Heat oven to 325°F (165°C). Grease and line two 4–5-inch cake pans with parchment. No tiny pans?
Bake one thin 6-inch layer and cut to size.
- Mix dry ingredients: In a bowl, whisk flour, sugar, baking powder, baking soda, and salt. Keep it even—lumps are not invited.
- Whisk wet ingredients: In another bowl, whisk oil (or butter), egg, milk, vanilla, and sour cream until smooth.
- Combine: Add wet to dry. Mix just until combined. Do not overmix unless you like rubber cake (you don’t).
- Bake: Divide batter into pans.
Bake 15–20 minutes until tops spring back and a toothpick is mostly clean. Small cakes cook fast; set a timer.
- Cool: Let cakes rest 10 minutes, then turn out onto a rack. Cool completely.
Warm cake + buttercream = slide city.
- Make buttercream: Beat butter until pale and fluffy, 2–3 minutes. Add powdered sugar, salt, and vanilla. Beat, adding cream 1 tsp at a time until smooth and spreadable.
Tint if desired.
- Level and layer: Trim domed tops for flat layers. Place one layer on a parchment square. Pipe a buttercream dam around the edge.
Fill with jam/curd/ganache if using. Top with second layer.
- Crumb coat: Apply a thin buttercream layer to seal crumbs. Chill 10–15 minutes until set.
- Final coat: Frost smoothly with a short offset spatula.
Small circles, light pressure. Spin the plate if you don’t have a turntable—DIY genius.
- Decorate: Pipe a border, add sprinkles, and write a message. Keep it bold and short—tiny canvas, big vibe.
- Box it up: Transfer to a fresh parchment square and place in a bento box.
Tie with twine for the signature look. Snap a pic (obviously).
How to Store
- Room temp: Up to 1 day if your kitchen is cool (68–72°F) and the filling isn’t perishable.
- Refrigerator: 3–4 days, boxed or covered. Bring to room temp 30–45 minutes before serving for best texture.
- Freezer: Unfrosted layers freeze up to 2 months, double-wrapped.
Thaw in the fridge overnight, then frost.
- Travel tip: Chill the finished cake 30 minutes before transport. It firms the frosting and prevents smudges.
Health Benefits
- Portion control built-in: Smaller cake, fewer “oops I had a fourth slice” moments. Your future self says thanks.
- Lower waste: You make what you’ll actually eat—less food waste, less guilt.
- Customizable ingredients: Swap in reduced sugar, whole-wheat pastry flour, or Greek yogurt for tweaks without tanking texture.
- Mental health bonus: Creative decorating reduces stress and boosts mood.
It’s art you can eat—tell your therapist.
Avoid These Mistakes
- Overbaking: Small layers go from perfect to dry fast. Start checking at 14–15 minutes.
- Skipping the crumb coat: Tiny cakes show every crumb. A quick seal makes pro-level edges.
- Warm cake + frosting: Melt city.
Cool layers fully before frosting.
- Runny buttercream: If too soft, add more powdered sugar or chill 5 minutes. If too stiff, add 1 tsp cream at a time.
- Overloading fillings: Too much jam = sliding layers. Stick to 2–3 tablespoons with a buttercream dam.
- Using liquid food color: It thins frosting.
Use gel color for vibrant hues without soup vibes.
Different Ways to Make This
- Chocolate Dream: Replace 2 tbsp flour with cocoa powder, add 1 tbsp espresso or hot water to bloom flavor.
- Strawberry Milk: Add 1 tbsp freeze-dried strawberry powder to batter and buttercream. Pink, fruity, nostalgia unlocked.
- Lemon Cloud: Add 1 tsp lemon zest to batter, fill with lemon curd, and frost with lemon-vanilla buttercream.
- Matcha Cream: Whisk 2 tsp matcha into dry ingredients; pair with white chocolate ganache filling. Very aesthetic, IMO.
- Dairy-Free: Use oil instead of butter in the cake, plant milk, and a vegan butter for frosting.
- Gluten-Free: Use a 1:1 gluten-free flour blend with xanthan gum.
Don’t overmix; give the batter 5-minute rest before baking.
FAQ
What size is a bento cake?
Typically 4–5 inches wide and about 2.5–3 inches tall. It serves 2–4 people comfortably without the “we’ll be eating cake all week” problem.
Can I use one pan and slice the layer?
Yes. Bake a single 4–5-inch tall layer (or a thin 6-inch), then chill and slice horizontally into two layers with a serrated knife.
How do I get smooth sides on such a tiny cake?
Chill the crumb coat, then use a small offset spatula and a bench scraper.
Rotate the plate while keeping your scraper steady. Short strokes are your friend.
What frosting works best?
American buttercream is the easiest and most stable. Swiss meringue buttercream is silkier but more work.
For hot climates, add a tablespoon of shortening for extra stability.
Can I color the sponge?
Absolutely. Use gel colors for vibrant batter without thinning. Mix lightly to avoid streaks turning into speckles after baking.
How do I write clean messages on top?
Use a small round piping tip (like #2 or #3).
Practice on parchment. Keep text short and spaced; tiny cake, tiny caption.
Is this safe to ship?
Not ideal. Bento cakes are small and delicate.
For short trips, chill well, pack snugly in a fitted box with non-slip mat, and keep upright.
Can I make it egg-free?
Yes. Replace the egg with 3 tbsp aquafaba or 1/4 cup applesauce. Texture changes slightly but still delish.
How do I prevent domed tops?
Bake at 325°F and don’t overfill.
You can also use cake strips or a folded wet paper towel ring around the pan to promote even baking.
Why is my buttercream gritty?
Powdered sugar wasn’t fully dissolved or sifted. Beat longer, add 1–2 tsp warm milk, and keep mixing until it’s fluffy and smooth.
Wrapping Up
Bento cakes check every box: fast to bake, fun to decorate, and cute enough to break the internet. With a plush mini sponge, silky buttercream, and that iconic box reveal, you’ve got a giftable dessert that actually fits your life.
Swap flavors, write a cheeky message, tie a bow, and call it a celebration. Small cake, big moment—exactly the point.