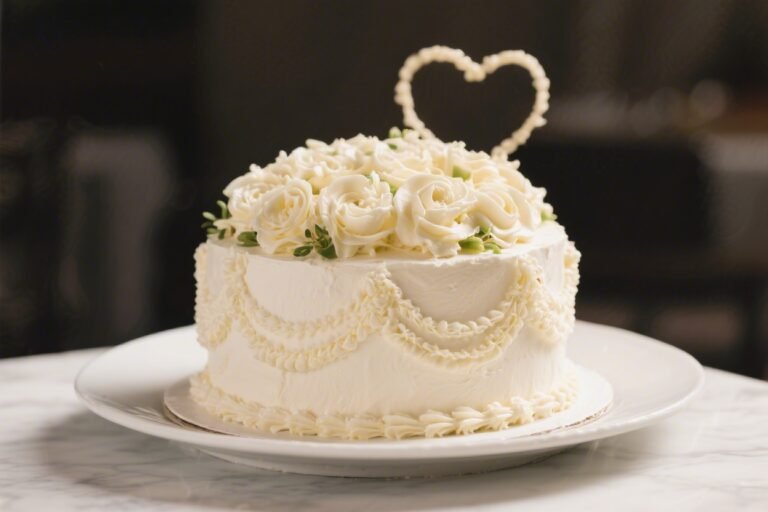
Cake Decorating Secrets You’ll Wish You Knew Sooner: From “Meh” to Showstopper in One Frosting Sweep
You don’t need a culinary degree to make a cake that looks like it belongs in a bakery window. You need a few smart tricks, the right tools, and a zero‑fear attitude. Most people overcomplicate cake decorating; they chase trends and skip fundamentals.
That’s why their frosting slides, their colors look muddy, and their edges scream “birthday-in-a-rush.” Today, let’s build a system that turns any cake into a scroll-stopper—even if your last art project was stick figures.
The Secret Behind This Recipe
Decorating isn’t about talent; it’s about temperature, texture, and timing. Get those three right and everything else feels easy. Your cake needs to be cool and level, your frosting needs the perfect spreadable consistency, and your decorations should be staged like a production line.
The real magic? A crumb coat that locks down crumbs and a bench scraper that gives you glass-smooth sides. Do this, and suddenly you’re the person everyone asks for “just one more cake.”
Ingredients Breakdown
- Fully baked and cooled cake layers (2–3 round layers, levelled)
- Buttercream frosting (about 6–8 cups for a 3-layer 8-inch cake)
- Simple syrup (optional, for brushing layers to keep moisture)
- Gel food coloring (not liquid; better saturation and no thinning)
- Piping gel or melted white chocolate (for securing decor)
- Decorations (sprinkles, macarons, fresh fruit, edible flowers, chocolate shards, cookies)
- Edible glitter or luster dust (optional flair)
- Fondant (optional, for accents or smooth finishes)
- Tools: offset spatula, bench scraper, piping bags, tips (1M, 4B, round 2A, leaf tip), turntable, cake board, leveler or serrated knife, parchment, and a small paintbrush for details
Step-by-Step Instructions
- Chill your canvas. Refrigerate cake layers 30–45 minutes.
Cold cake won’t shed crumbs like a drama queen. If domed, level with a serrated knife.
- Boost moisture (optional). Brush each cut surface with light simple syrup. This keeps layers tender without making them soggy.
- Anchor the cake. Smear a tablespoon of buttercream on a cake board.
Place the first layer, cut side up, centered on a turntable. Stability = clean lines.
- Build the core. Pipe a dam of frosting around the edge, fill the center, then stack the next layer. Repeat.
Press gently to set; check from all sides to keep it vertical.
- Crumb coat like a pro. Apply a thin, see-through layer of buttercream. Smooth with a bench scraper while spinning the turntable. Chill 20–30 minutes until firm to the touch.
- Mix your colors smartly. Tint buttercream with gel colors in separate bowls.
Start with a toothpick amount—colors deepen as they sit (FYI: blue + a dot of violet fixes yellowish whites).
- Final coat = flawless. Apply a generous layer of buttercream. Smooth the sides with the bench scraper, cleaning it often. Pull the excess from the top edges inward with an offset spatula for a crisp rim.
- Create textures or ombré. For stripes, pipe colored rings around the cake and smooth.
For watercolor, dab random color patches, then lightly blend with the scraper. Keep pressure even.
- Pipe with intention. Fit piping bags with tips:
- 1M/4B: rosettes, ruffles, cupcake swirls
- Round 2A: pearls, dots, borders
- Leaf tip: foliage accents around flowers
Practice on parchment first. Consistent pressure = consistent shapes.
- Add statement decor. Press sprinkles up the sides (use a parchment “collar” for a clean top line), nestle fruit or macarons on top, or attach chocolate shards with a touch of buttercream or piping gel.
- Detail and shine. Paint luster dust on chilled buttercream accents for a metallic pop.
Keep it subtle—this is cake, not a disco ball.
- Chill to lock it in. Refrigerate 20–30 minutes so everything sets before transport or slicing.
Preservation Guide
- Short-term (1–2 days): Keep the decorated cake covered at cool room temp if the filling is shelf-stable (buttercream, jam). Avoid direct sun and heat.
- Medium-term (3–5 days): Refrigerate in a cake box or dome. Bring to room temp 1–2 hours before serving for best texture.
- Long-term: Freeze undecorated layers double-wrapped up to 2 months.
For decorated cakes, freeze briefly to firm, wrap carefully, and thaw overnight in the fridge, then at room temp. Prevent condensation by keeping it wrapped while thawing.
- Fresh fruit/flowers: Add within 12–24 hours of serving. Pat fruit dry; use flower picks or tape stems if not certified edible.
Nutritional Perks
- Control over sugar and fats: Homemade buttercream lets you moderate sweetness or swap part butter with cream cheese for tang.
- Cleaner ingredient list: You choose the colors (gel-based, fewer drops) and skip unnecessary stabilizers found in store-bought frostings.
- Portion mindfulness: Tall layers and bold flavors let smaller slices satisfy—your future self will say thanks.
- Add-ins with benefits: Fresh berries add fiber and antioxidants; nuts add texture and healthy fats.
It’s still dessert, but smarter.
What Not to Do
- Don’t frost a warm cake. Heat melts buttercream, slides decorations, and guarantees tears. Chill first.
- Don’t over-mix colored buttercream. You’ll whip in air and dull the color. Stir gently by hand at the end.
- Don’t use liquid food coloring. It thins the frosting and causes streaks.
Gel or powder only, IMO.
- Don’t skip the crumb coat. It’s the seatbelt for your frosting. No coat = crumb-confetti finish.
- Don’t overload the top. Heavy decor without support sinks. Balance weight and anchor with buttercream or skewers if needed.
Alternatives
- Frosting swaps: Swiss meringue buttercream (silky, less sweet), ganache (glossy, rich), stabilized whipped cream (light, chill-dependent), or cream cheese frosting (tangy, dreamy).
- No-pipe finish: Go for a rustic swirl with an offset spatula, a textured comb finish, or a naked cake style with minimal frosting for effortless chic.
- Color techniques: Monochrome elegance, two-tone ombré, or terrazzo confetti using fondant shards pressed into the sides.
- Decor themes: Fresh florals, geometric chocolate sails, drip cakes (ganache slightly warm), or sprinkle gradients that fade up the sides.
- Allergy-friendly: Dairy-free buttercream with vegan butter/shortening blend, gluten-free cake layers, or natural colors from powders like beet, spirulina, and turmeric (use sparingly).
FAQ
How do I get perfectly smooth sides?
Chill the crumb coat, apply a thicker final coat, then use a bench scraper at a slight angle while the cake spins on a turntable.
Clean the scraper often and finish the top rim by pulling excess inward with an offset spatula.
Why is my buttercream full of bubbles?
You likely whipped too fast or too long. Switch to a paddle attachment, mix on low a few minutes to knock out air, then press and fold with a spatula. Let it rest 10–15 minutes; bubbles rise as it sits.
My colors look dull.
What gives?
Use gel colors, start small, and let them develop for 15–30 minutes. For vibrant shades, layer color gradually. A micro-dot of violet can neutralize yellow in white buttercream for a cleaner base.
How do I stop the cake from leaning?
Level each layer, press evenly when stacking, and view the cake at eye level.
If it’s tall or heavy, insert a center dowel or a few bubble tea straws for support before the final coat.
Can I decorate a frozen cake?
Yes, but let it thaw wrapped in the fridge to avoid condensation. Frosting on a thawing, wet surface slides and blisters. Work on chilled-but-dry layers for best results.
What’s the trick to a clean sprinkle edge?
Wrap a strip of parchment around the cake to form a collar, press sprinkles up to the edge, then remove the parchment.
For bands, chill the cake first so stray sprinkles don’t stick everywhere.
In Conclusion
Cake decorating isn’t mystical—it’s methodical. Chill the cake, control your frosting, and treat the process like a mini assembly line. Add a few pro moves—crumb coat, bench scraper, gel colors—and your cakes jump from “nice” to “who made this?!” Keep it playful, keep it clean, and remember: the best decorations are the ones that make people smile before they take the first bite.