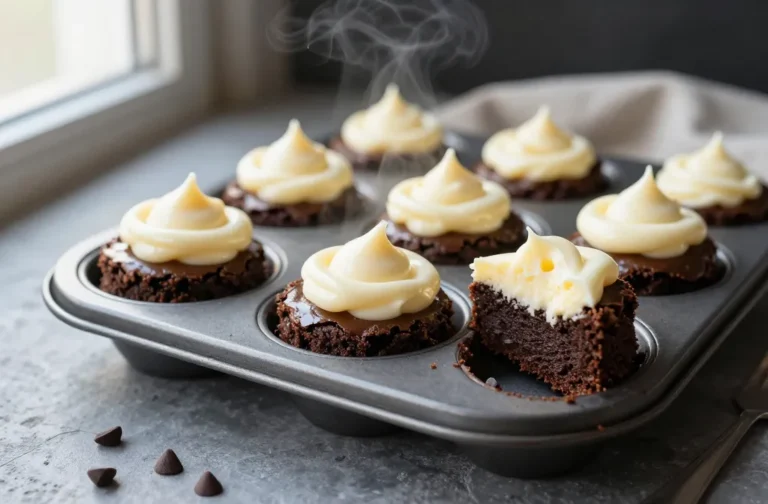
Cake Pops That Actually Pop: The Tiny Treats Turning Leftover Cake Into Viral Gold
You’ve got cake scraps? Congratulations—you’re holding a money printer in your kitchen. Cake pops take the leftover, the imperfect, the “oops I overbaked” and flip it into something people will line up for.
They’re bite-sized, Instagram-ready, and dangerously munchable. And here’s the kicker: they’re way easier than they look. Once you learn the rhythm—crumble, bind, dip—you’ll wonder why you ever bought them pre-made.
What Makes This Recipe Awesome
- Zero waste, all reward: Use leftover cake or a store-bought sheet cake.
No judgment, just results.
- Customizable like crazy: Any flavor combo works—red velvet with cream cheese, chocolate with Nutella, funfetti with vanilla. Your vibe, your rules.
- Crowd-pleaser factor: Parties, bake sales, birthdays—these disappear faster than you can refill the plate.
- Beginner-friendly: No pastry school required. If you can roll a ball and dip it, you’re good.
- Kid-friendly project: Rolling, dipping, decorating—fun for little hands and short attention spans.
Ingredients Breakdown
- 1 standard 9×13-inch cake (any flavor, fully cooled; boxed or homemade both work)
- 1/2 to 3/4 cup frosting (buttercream, cream cheese, or ganache—start with less)
- 12–16 ounces candy melts (or tempered chocolate for a thinner, glossier shell)
- 1–2 teaspoons coconut or vegetable oil (optional; thins coating for smoother dips)
- Sprinkles or crushed toppings (funfetti, cookie crumbs, freeze-dried fruit, etc.)
- Lollipop sticks (also called treat sticks)
- Foam block or a sturdy box (to hold pops upright while they set)
- Pinch of salt (optional; balances sweetness)
How to Make It – Instructions
- Crumble the cake: In a large bowl, break the cooled cake into fine crumbs using clean hands.
Remove any hard edges. You want soft, even crumbs—no big chunks.
- Add frosting low and slow: Mix in 1/2 cup frosting to start. Use your hands or a spatula until it resembles a dough that holds together when squeezed.
If it crumbles, add 1 tablespoon more frosting at a time. Don’t oversaturate.
- Roll the balls: Scoop tablespoon-sized portions (about 1 inch) and roll into smooth balls. Aim for uniform size so they set evenly and look pro.
- Chill the dough balls: Place on a parchment-lined tray and refrigerate for 30 minutes or freeze for 10–15 minutes.
They should be firm, not rock-hard.
- Melt the coating: Microwave candy melts in 20–30 second bursts, stirring between each, until smooth. Stir in 1–2 teaspoons oil if it’s too thick. Keep it warm and fluid.
- Stick setup: Dip the tip of each lollipop stick about 1/2 inch into the melted coating, then insert into the center of a chilled ball.
This acts like glue.
- Chill again briefly: Pop them back in the fridge for 5–10 minutes to secure the sticks.
- Dip like a pro: Submerge each pop in the coating, tilting the cup and turning the pop to cover fully. Lift out and gently tap the stick on the bowl’s edge while rotating to shed excess. Patience = no drips.
- Decorate fast: Add sprinkles or toppings before the coating sets.
Place upright in a foam block to dry completely (10–20 minutes).
- Serve or store: Once set, you’re ready. If you’re not serving right away, see the storage tips below to keep them picture-perfect.
Keeping It Fresh
- Room temp: Store in a cool, dry spot in an airtight container for up to 3 days if using buttercream and a candy coating. Avoid direct sun (unless you like meltdowns).
- Refrigerate: If using cream cheese frosting, refrigerate up to 5 days.
Let sit 15 minutes before serving for best texture.
- Freeze (undipped): Freeze rolled cake balls on a sheet pan, then transfer to a freezer bag up to 2 months. Thaw in the fridge before dipping to prevent cracking.
- Avoid condensation: When moving from cold to warm, keep them covered while they come to room temp. That prevents sticky surfaces and sprinkle slippage.
What’s Great About This
- Scalable: Make 12 or 60 without losing your mind.
Double the dip, roll more balls, you’re set.
- Budget-friendly: Leftover cake becomes a luxe-looking treat with a few pantry staples.
- Portable: On sticks = no plates, no forks, no crumbs. Event planners everywhere, rejoice.
- High impact, low effort: They look boutique, but the process is basically snackable arts and crafts.
Common Mistakes to Avoid
- Adding too much frosting: If the mixture is greasy or slumps, you overdid it. Add more cake crumbs to rebalance.
- Skipping the chill: Warm pops fall off sticks and crack in coating.
Cold balls + secured sticks = stable dips.
- Coating too thick: Candy melts need thinning. A teaspoon of oil (or paramount crystals) keeps the shell smooth and crack-free.
- Overheating the coating: Burnt melts get lumpy and sad. Short bursts, lots of stirring—treat it like it has trust issues.
- Stabbing off-center: Insert sticks straight and to the middle.
Off-center equals wobbly pops and broken hearts.
- Decorating too late: Sprinkles need wet coating to stick. Move quickly or they’ll slide off like they pay rent elsewhere.
Recipe Variations
- Red Velvet + Cream Cheese: Classic bakery vibes. Add a pinch of salt to the crumbs for balance.
- Chocolate Hazelnut: Chocolate cake with 1/2 cup Nutella as the binder.
Dip in dark coating, finish with chopped hazelnuts.
- Funfetti Birthday: Vanilla cake with rainbow sprinkles mixed into the crumbs. White coating, extra sprinkles—obviously.
- Cookies & Cream: Vanilla cake + crushed chocolate sandwich cookies in the crumb mix. Dip in white coating with more cookie dust.
- Lemon Raspberry: Lemon cake + a touch of lemon curd.
White coating, drizzle with pink-tinted melts and crushed freeze-dried raspberries. Chef’s kiss, IMO.
- Tiramisu Pop: Coffee-soaked vanilla cake with mascarpone-buttercream binder. Coat in milk chocolate, dust with cocoa.
- Gluten-Free Fix: Use a GF cake mix and ensure your coating and sprinkles are certified GF.
Texture still slaps.
FAQ
Why are my cake pops cracking?
Temperature shock. If the cake balls are too cold and the coating is very warm, the shell contracts and cracks. Let the balls sit a few minutes out of the fridge before dipping, and keep the coating warm—not hot.
How do I get the coating super smooth?
Thin the melts with 1–2 teaspoons of neutral oil and stir thoroughly.
Dip with a gentle tilt-and-turn motion, then tap off excess slowly. A tall, narrow cup helps keep the coating deep and fluid.
Can I use real chocolate instead of candy melts?
Yes, but temper it for snap and shine. If you don’t temper, the shell may bloom or stay soft.
Candy melts are more forgiving for beginners, FYI.
How big should I roll the cake balls?
About 1 inch (roughly 20–25 grams). Too big and they slide off the stick; too small and they dry out. Uniform size also makes your display look next-level.
My pops keep falling off the sticks—help?
Make sure the mixture isn’t too soft, chill longer, and always dip the stick tip in coating before inserting.
Tap off excess coating gently—don’t bang the stick like a drum solo.
Can I make them a day ahead?
Absolutely. Dip and decorate, then store at cool room temp (buttercream-based) or in the fridge (cream cheese-based). Refresh with a quick drizzle the day of if you want that bakery flex.
What’s the best way to color the coating?
Use oil-based candy colors for melts or cocoa butter–based colors for real chocolate.
Water-based gels can seize chocolate and ruin your day.
The Bottom Line
Cake pops are the ultimate glow-up: humble cake crumbs transformed into glossy, bite-sized showpieces. With a smart ratio of cake to frosting, a quick chill, and a silky coating, you’ll get polished results without stress. They’re customizable, portable, and ridiculously charming—aka party MVPs.
Master the basics once, and you’ve got an evergreen treat that delivers every single time.