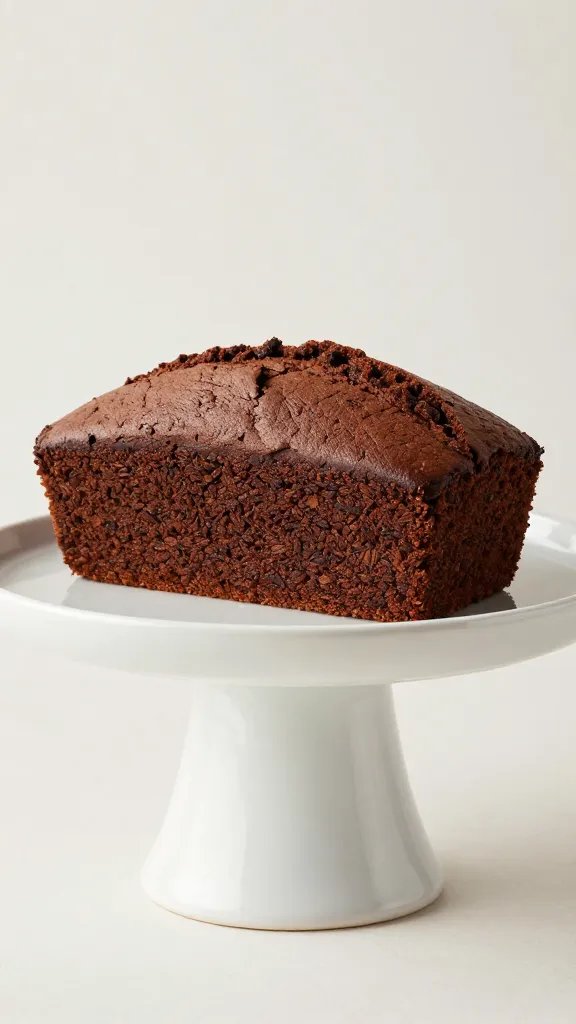
Chocolate Peanut Butter Cake: a Wow-Worthy Edition
I’m not saying chocolate and peanut butter are soulmates, but I am saying they practically adopted each other in dessert form. This cake knows how to party: rich cocoa, glossy ganache, and that sweet-savory peanut kick. Ready to bake something legendary? Let’s dive in.
The Charm of Chocolate Peanut Butter Cake
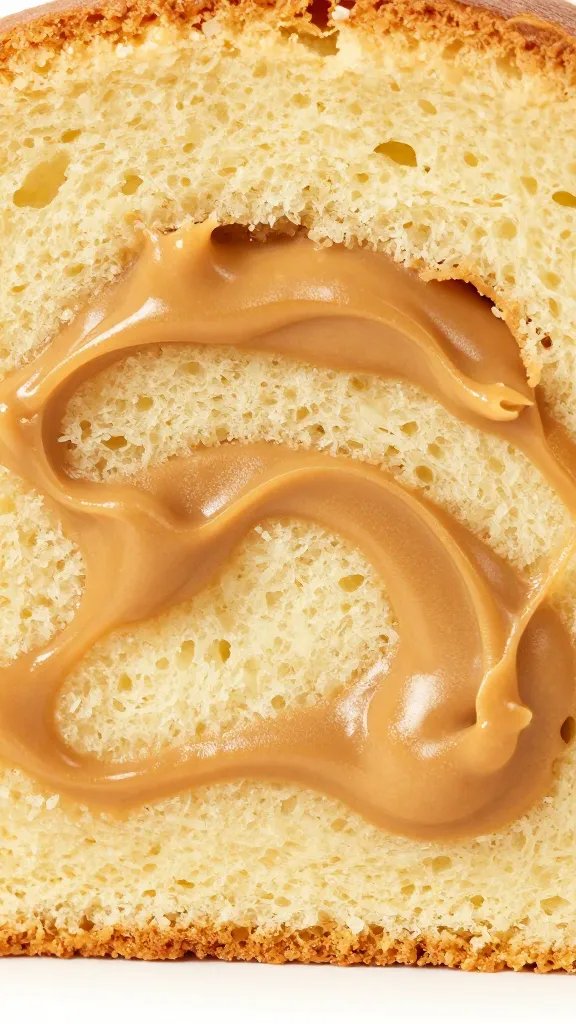
Who knew a simple loaf of cake could feel like a red-carpet moment? This cake layers up the best of both worlds: deep chocolate flavor and creamy peanut butter filling that melts in your mouth. It’s the kind of dessert you bring to a party and somehow become everyone’s favorite under-the-table hero. FYI, there’s no need for a complicated recipe to win hearts here.
What You’ll Need: Ingredients Without the Drama

– For the cake: high-quality cocoa powder, flour, sugar, eggs, buttermilk, oil, vanilla, baking soda, salt
– For the peanut butter filling: creamy peanut butter, powdered sugar, butter, a splash of milk or cream
– For the ganache glaze: chocolate chips or chopped chocolate, heavy cream, a knob of butter
– Optional toppings: crushed peanuts, flaky salt, a swirl of extra peanut butter
– Pro tip: room temperature ingredients make this smoother and faster
Step-by-Step: From Batter to Beautiful
If you’re someone who sauces the drama, here’s a straightforward path to greatness:
– Preheat and prep: Get your oven hot and your pans greased. Don’t skip this step unless you want a cake that sticks to the pan and ruins your day.
– Mix the dry and wet: Don’t overwork the batter. A few lumps are totally fine and bake better than a super-smooth batter that tastes like cardboard.
– Layer wisely: Build at least two layers with a generous peanut butter center. You want the filling to ooze out just enough to remind everyone why they’re here.
– Bake and cool: Let the cake rest completely before frosting. If you cut into it warm, you’ll get a crumbly disaster instead of that fluffy, sliceable goodness.
– Glaze and finish: A glossy ganache drapes the top like a spoiler you actually want. Sprinkle a little salt or crushed peanuts for crunch.
Flavor Profiles: The Peanut Butter Roast
This cake isn’t shy. The chocolate backbone is rich but balanced, while the peanut butter layer adds a creamy, slightly salty contrast. It’s sweet without being cloying and decadent without requiring a full-on sugar coma afterwards.
– Dark chocolate vibe: For a more sophisticated bite, amp up the cocoa and cut back sugar a touch.
– Sweet-and-salty balance: Don’t go light on the peanut butter filling. That contrast is where the magic lives.
– Texture delights: A little crunch from chopped peanuts on top or a sprinkle of sea salt makes every bite pop.
Decoration Ideas: Make It Insta-Worthy (Without Killing Your Soul)
Presentation can sell the cake before the first bite. Here are easy tricks:
– Ganache glaze: Let it drizzle slowly down the sides; uneven drips look artisanal, not messy.
– Peanut butter ribbons: Pipe swirls of peanut butter on top for a café vibe.
– Crushed peanuts and a pinch of flaky salt: A simple crunch with a sexy finish.
– Layer edges: No shame in extra frosting on the sides to create a clean, professional look.
Variations: Tweak It Without Breaking It
– Peanut butter swirl: Instead of a thick center filling, plop dollops of peanut butter in the middle and swirl with a knife.
– Salted caramel twist: Add a caramel ribbon or a salted caramel glaze for a gooey, irresistible surprise.
– Nutty crowd-pleaser: Toss in chopped roasted peanuts or chocolate chips for texture and extra flavor.
Make-It-Your-Own Subsections
– Gluten-free option: Swap all-purpose flour for a 1:1 gluten-free blend plus a touch more milk to keep moisture.
– Vegan adaptation: Use flax eggs, plant-based milk, and dairy-free butter to keep the cake soft and delicious. Ganache can be made with dairy-free chocolate and coconut cream.
Tips That Save Time (And Your Sanity)
– Room temperature everything: Butter, eggs, and milk should be warmish to keep the batter emulsified.
– Don’t overbake: This cake is tender and moist. If you go too long, you’ll end up with a dry slice you pretend you didn’t bake.
– Chill for clean slices: Let the cake set in the fridge before slicing; it makes ganache shine and slices neat.
– Use good-quality chocolate: FYI, chocolate is usually the star here, so invest a little. It pays off in flavor.
FAQ
Can I make this cake ahead of time?
Yes. Bake the cake, wrap it well, and refrigerate for up to 2 days. Assemble with filling and glaze just before serving for a fresh, glossy look.
What if I don’t have buttermilk?
Substitute with 1 cup milk plus 1 tablespoon white vinegar or lemon juice. Let it sit 5 minutes, then use as you would buttermilk. It behaves pretty similar in moisture and acidity.
Is the peanut butter filling supposed to be sweet?
You can dial it to your taste. If you want a more balanced bite, use less powdered sugar and a pinch of salt to mimic that classic peanut butter cup flavor.
How do I store leftovers?
Cover and refrigerate for up to 3 days. Bring slices to room temperature before serving to reclaim softness and shine.
Can I freeze this cake?
Yep. Freeze unfrosted cake layers for up to 2 months. Thaw completely, spread filling, then glaze. Gift wrap helps keep it pristine if you’re sharing with friends or yourself on a cheat day.
Conclusion
There you have it: a chocolate peanut butter cake that tastes like a victory lap. It’s rich, cozy, and a little cheeky—perfect for celebrations, casual weekends, or “I deserve cake” days. IMO, this cake proves that dessert can be both comforting and wow-worthy without requiring a culinary degree. So go ahead, bake it, slice it, and watch the room light up with happy crumbs.