The Best Homemade Donuts Recipe Ever
Forget those sad, stale donuts from the drive-thru. We’re talking about real donuts here, the kind that are pillowy soft on the inside, perfectly golden and crisp on the outside, and absolutely swimming in a glaze that melts in your mouth. Making them at home isn’t just possible, it’s an incredibly rewarding experience that will make your kitchen smell like pure joy. Get ready, because your donut game is about to go pro.
Why Homemade Donuts Are Your New Obsession
Let’s be real: store-bought donuts often disappoint. They’re either too dense, too greasy, or just bland. But homemade? Oh, honey, that’s a whole different ballgame. You control the ingredients, the freshness, and most importantly, the love that goes into every single bite.
Think about it. You pull these beauties from the fryer, glistening and warm, then dunk them into a glaze you whipped up yourself. The aroma alone is a spiritual experience. Plus, the bragging rights? Unbeatable. Your friends will declare you a culinary wizard, and honestly, you’ll deserve it.
The Dough: It’s Not as Scary as You Think
Okay, I know what you’re thinking: yeast. *Gasp!* But seriously, working with yeast is nowhere near as intimidating as some folks make it out to be. It just needs a little warmth, a little sugar, and a little patience. Treat it right, and it will reward you with the fluffiest dough imaginable.
Your mission, should you choose to accept it, is to create a soft, slightly sticky dough. This isn’t a bread dough that needs to be super stiff; we want light and airy here. Don’t over-flour it, or you’ll end up with donut hockey pucks, and nobody wants that.
Yeast Whisperer 101
Activating yeast is simple. You need warm liquid – I prefer milk, but water works too – somewhere between 105-115°F (40-46°C). Too cold, and the yeast stays asleep. Too hot, and you kill it. A quick dip of your finger should feel like a warm bath, not scalding hot. Add a pinch of sugar to the liquid, then sprinkle in your active dry yeast. Let it sit for about 5-10 minutes. If it gets foamy and bubbly, congratulations, your yeast is alive and ready to party! If not, well, maybe try again with fresh yeast.
Kneading for Greatness
Once you mix all your ingredients, you’ll knead the dough. This develops the gluten, which gives your donuts their structure and chewiness. You can use a stand mixer with a dough hook (my personal MVP) or get a good arm workout by kneading by hand. Knead until the dough is smooth and elastic. It should spring back when you gently poke it. This usually takes about 5-8 minutes in a mixer, or 10-15 minutes by hand.
First Proof: Let the Magic Happen
After kneading, your dough needs to rest and rise. This is called the first proof. Lightly grease a large bowl, place your dough in it, and turn it once to coat. Cover the bowl with plastic wrap or a clean kitchen towel and find a warm, draft-free spot. Your oven, turned off but with the light on, is an excellent proofing chamber.
The dough should double in size, which usually takes 1 to 1.5 hours, depending on your kitchen’s temperature. Don’t rush this part! The longer and slower the rise, the better the flavor and texture of your donuts. Patience is a virtue, especially in donut making.
Shaping & Second Proof: The Donut’s Glow Up
Once your dough has risen, gently punch it down to release the air. Turn it out onto a lightly floured surface. Now, roll it out to about a 1/2-inch thickness. You want it thick enough to be substantial but not so thick it feels like a brick.
Use a donut cutter (or two concentric cookie cutters, or even a glass and a small bottle cap for the hole) to cut out your donut shapes. Don’t forget the donut holes – they’re arguably the best part! Gather the scraps, gently re-roll them, and cut out more donuts until you’ve used up all the dough.
The Final Nap
Place your cut donuts on parchment-lined baking sheets, leaving some space between them. Cover them loosely with plastic wrap or a clean towel again. This is the second proof. They need another 30-45 minutes to puff up again, almost doubling in size. This final rise is crucial for light, airy donuts. If they don’t rise enough, they’ll be dense. If they over-rise, they might collapse in the fryer. You’re looking for that sweet spot.
Frying: The Golden Moment
This is where the magic really happens, but also where you need to be a little cautious. Frying can seem intimidating, but with the right tools and attention, it’s totally manageable.
Oil Temperature is King
You need a good, neutral oil with a high smoke point, like vegetable, canola, or peanut oil. Pour enough into a heavy-bottomed pot or Dutch oven so it’s about 2-3 inches deep. Heat the oil to 350-360°F (175-180°C). This is non-negotiable. A thermometer is your best friend here – seriously, don’t guess. Too cold, and your donuts will be greasy. Too hot, and they’ll burn on the outside before cooking through.
Carefully slide a few donuts into the hot oil, making sure not to overcrowd the pot. Fry for about 1-2 minutes per side, until they’re beautifully golden brown. Use a slotted spoon or spider to flip them. Transfer the cooked donuts to a wire rack set over a baking sheet to drain any excess oil.
Glazing & Decorating: Your Donut, Your Rules
This is the fun part where you get to unleash your inner artist. The classic vanilla glaze is a winner, but don’t be afraid to experiment!
Classic Vanilla Glaze Recipe (because it’s perfect)
* 2 cups powdered sugar
* 1/4 cup milk (or cream for extra richness)
* 1 teaspoon vanilla extract
* A pinch of salt
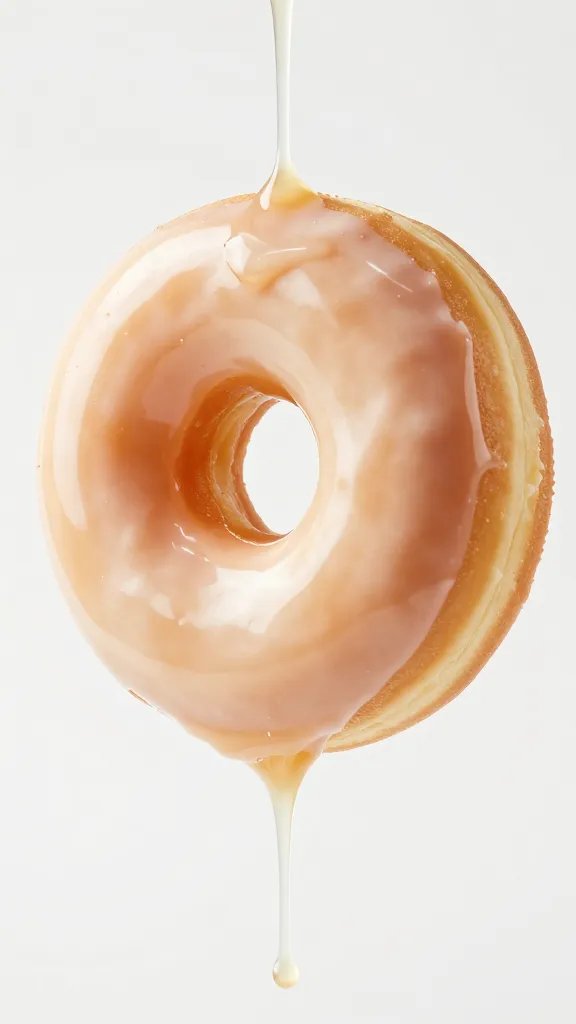
Whisk everything together until smooth. If it’s too thick, add more milk a teaspoon at a time. Too thin? Add more powdered sugar. You want a consistency that’s thick enough to coat the donut but thin enough to drip off slightly.
While the donuts are still warm (but not piping hot), dip them into the glaze, turning to coat both sides. Place them back on the wire rack to let the excess drip off and the glaze set.
Other Fun Toppings:
* Cinnamon Sugar: Toss warm donuts in a mix of granulated sugar and cinnamon.
* Chocolate Glaze: Add cocoa powder to your vanilla glaze, maybe a splash of coffee.
* Sprinkles: Because sprinkles make everything better. IMO, a donut without sprinkles is just a sad cake.
* Maple Bacon: Drizzle with maple glaze and sprinkle with crispy bacon bits. Don’t knock it ’til you try it!
Homemade Donut Recipe Rundown
Here’s a quick overview of what you’ll need and the basic steps.
Ingredients:
* 1 cup warm milk (105-115°F)
* 2 1/4 teaspoons active dry yeast (one packet)
* 1/4 cup granulated sugar, plus 1 tsp
* 1 large egg, room temperature
* 1/4 cup unsalted butter, melted
* 1 teaspoon vanilla extract
* 1/2 teaspoon salt
* 3 to 3 1/2 cups all-purpose flour
* Vegetable oil for frying (about 6-8 cups)
* For the glaze: 2 cups powdered sugar, 1/4 cup milk, 1 tsp vanilla extract, pinch of salt
Instructions (the quick version):
1. Activate yeast: Combine warm milk, 1 tsp sugar, and yeast. Let sit 5-10 mins.
2. Make dough: In a large bowl, whisk egg, melted butter, vanilla, remaining sugar, and salt. Add yeast mixture. Gradually add flour, mixing until a soft dough forms.
3. Knead: Knead for 5-8 mins (mixer) or 10-15 mins (hand) until smooth and elastic.
4. First Proof: Place dough in a greased bowl, cover, and let rise in a warm place until doubled (1-1.5 hours).
5. Shape: Gently punch down dough. Roll to 1/2-inch thick. Cut out donuts and holes.
6. Second Proof: Place donuts on parchment-lined baking sheets, cover, and let rise until puffy (30-45 mins).
7. Fry: Heat oil to 350-360°F (175-180°C). Fry donuts 1-2 mins per side until golden. Drain on a wire rack.
8. Glaze: Whisk glaze ingredients. Dip warm donuts in glaze. Let set.
FAQ: Your Donut Dilemmas Solved
Can I bake these donuts instead of frying them?
You *can*, but they won’t be the same. Baked donuts are more like cake donuts, dense and cake-like. These are yeast-risen donuts, designed for that fluffy, airy texture that only frying achieves. If you’re really set on baking, you’d need a different recipe entirely. Don’t compromise on the fry, trust me!
How long do homemade donuts last?
Honestly, they’re best eaten the day they’re made, ideally within a few hours of frying. They tend to lose their freshness and become a bit stale or tough by the next day. If you have leftovers (a rare occurrence, FYI), store them in an airtight container at room temperature. A quick zap in the microwave for 10-15 seconds can sometimes revive them a bit.
What’s the best oil for frying donuts?
A neutral-flavored oil with a high smoke point is key. My top picks are vegetable oil, canola oil, or peanut oil. Avoid olive oil or butter, as they have lower smoke points and will burn before your donuts are cooked through.
Can I make the dough ahead of time?
Absolutely! This is a great time-saver. After the first proof, punch down the dough, cover it tightly with plastic wrap, and refrigerate it overnight (up to 24 hours). The next morning, let it come to room temperature for about 30 minutes before rolling and cutting. Then proceed with the second proof and frying as usual.
My donuts are greasy. What went wrong?
Nine times out of ten, greasy donuts are a result of the oil not being hot enough. If the oil temperature drops below 350°F, the donuts absorb too much oil instead of cooking quickly and forming a crisp exterior. Always use a thermometer and maintain that oil temperature!
Go Forth and Fry!
So there you have it. Making homemade donuts is a journey, not just a recipe. It’s about embracing the process, getting a little flour on your nose, and enjoying the incredible payoff. Don’t be afraid to experiment, don’t be afraid to make a mess, and definitely don’t be afraid to eat more than one. Your kitchen is now a donut factory, and you’re the master baker. Go forth, fry some magic, and share the joy! Or don’t share, I won’t judge.