11 Tips To Care For Monstera Moss Pole And Support Growth
Your Monstera wants to climb, not sulk on the shelf. A moss pole gives those aerial roots something to grab, and suddenly your plant behaves like the rainforest royalty it is. Want bigger leaves, fenestrations, and less floppiness?
Nail your pole setup and care. Here are 11 tips that actually work—minus the vague plant mysticism.
Choose the right pole (and size actually matters)
You have options: sphagnum moss poles, coco coir poles, wood planks, or bendy “totems.” For Monstera, sphagnum or coco coir poles win because roots can grip and drink from them. Wood planks look chic but don’t hold moisture as well. Go taller than you think you need. Choose a pole that’s at least the height of your plant and preferably extendable.
If your Monstera doubles in a year (which it might), you won’t want to redo the whole setup.
Sphagnum vs. coco coir
– Sphagnum: Holds moisture like a dream. Roots love it. Needs careful sourcing (skip dyed or treated moss). – Coco coir: Dries faster, less prone to compression, usually cheaper and easier to find. – My pick, IMO: sphagnum for thirsty roots and quick anchoring; coir for lower-maintenance folks.
Install the pole before your Monstera turns into a jungle
If your plant already sprawls, you’ll wrestle it like an octopus.
Do this early. Insert the pole into the pot and down to the bottom so it stays stable. Then tie stems loosely to the pole to encourage the aerial roots to reach and attach. Tip: Use soft ties: garden Velcro, jute twine, or silicone plant ties.
No wire. No zip ties. You’re training, not handcuffing.
Repot with the pole anchored
– Choose a pot 2–3 inches wider than the current one. – Set the pole first, then situate the root ball. – Backfill with chunky mix (more on that next). – Tie stems gently and adjust leaves so they don’t rub against the pole constantly.
Use a chunky, fast-draining soil mix
Monsteras hate wet feet, even while they love a moist pole.
Contradictory? Sure. But we manage it with the right mix.
Aim for 60–70% chunky components. Try this:
- 1 part high-quality potting soil
- 1 part orchid bark
- 1 part perlite or pumice
- Optional: a handful of horticultural charcoal and worm castings
This keeps the roots happy and the watering drama to a minimum.
Moisten the pole—strategically
The pole should feel like a wrung-out sponge, not a soggy swamp. Lightly mist or pour water down the pole so it wicks into the moss/coir.
Do this 2–4 times a week depending on your home’s humidity. Pro move: Use a squeeze bottle or narrow-spout watering can to hydrate just the pole, not the soil. That way you avoid overwatering the plant while keeping the aerial roots quenched.
Self-watering hacks
– Add a thin drip line or wick to the pole for consistent moisture. – Wrap the pole with a light layer of plastic mesh to hold moss snugly and slow evaporation. – Consider a humidifier nearby. Your skin and your Monstera will thank you.
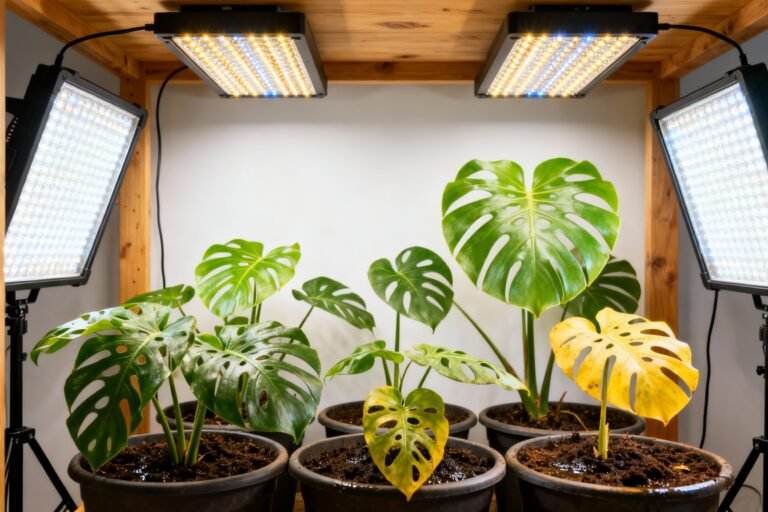
Light your Monstera like you mean it
You want bright, indirect light for lush growth and fenestrations.
A few hours of gentle morning sun works, but harsh afternoon rays can crisp leaves and dry the pole too fast. North or east-facing windows = great. South or west = diffuse with a sheer curtain.
If your Monstera leans, it begs for more light. Rotate the pot every couple of weeks so it grows evenly up the pole.
Feed for steady growth (not chaos)
Monsteras eat when they climb. During spring and summer, fertilize every 2–4 weeks with a balanced liquid fertilizer at half strength.
In fall and winter, cut it way back. IMO, slow-release granules in the soil + mild liquid feed once a month = perfect combo. Don’t fertilize dry soil—water first, then feed.
Your roots will stay safe.
Guide aerial roots onto the pole
Aerial roots will reach out like tiny brown tentacles. When you see them, press them gently into the moss and secure with plant ties. Keep the area slightly moist—this encourages the roots to “velcro” themselves to the pole. Do not cut healthy aerial roots. They’re your plant’s climbing gear and moisture straws.
If one gets unruly, tuck it into the pole or the pot.
If roots won’t attach
– Keep the pole a bit wetter for a week or two. – Move the plant slightly closer to the pole and retie. – Increase humidity to 60%+. – Add a thin fresh layer of moss to any bald, dry sections of the pole.
Prune and shape for power growth
Snip leggy stems just above a node to encourage branching. Use clean, sharp shears and make decisive cuts. You can propagate cuttings with a node and aerial root—plant them back into the base for a bushier look.
It’s like free plants, FYI. Don’t overpack the pole with too many stems though. You still want airflow and light penetration.
Extend or replace the pole before it’s maxed out
When your Monstera outgrows the pole, add a new section while it’s still easy to handle. Many poles stack.
If yours doesn’t, you can splice a second pole with sturdy ties and mesh overlap so the surface stays continuous for roots. If the pole collapses or molds (it happens), replace it during a repot. Keep as many attached roots as possible by gently unwrapping, or trim and re-tie—Monsteras bounce back fast.
Watch for moisture and mold balance
A consistently damp pole invites life—some good, some gross.
A little green algae? Fine. Fuzzy white mold?
Not fine. Improve airflow, reduce misting frequency, and wipe the surface with a diluted hydrogen peroxide solution (3% mixed 1:1 with water) if needed. Golden rule: Moist pole, not soaked pot. If the soil stays wet for more than 5–7 days, you’re overwatering or your mix needs more chunk.
FAQs
How often should I water the moss pole itself?
Aim for 2–4 times per week, or whenever the outer layer feels dry.
In very dry homes, you might do a quick daily spritz. Always check the soil separately—keep it on its own schedule so you don’t drown the roots.
Can I switch from a coir pole to a moss pole later?
Yes. Do it during a repot so you can stabilize everything.
Expect a brief sulk while the plant adjusts. Tie stems securely and keep humidity up for a couple of weeks to encourage reattachment.
Why won’t my Monstera climb the pole?
Usually the pole stays too dry, the plant sits too far away, or light runs low. Moisten the pole more consistently, tie the stems closer, and upgrade the light.
Also check that you installed the pole deeply and securely—wobbly poles scare roots off, IMO.
Do I need to fertilize if I’m misting the pole a lot?
Yes, but keep fertilizer in the soil watering routine, not in your mister. Foliar feeding can help occasionally, but Monsteras prefer nutrients in the root zone. Use a diluted balanced fertilizer during active growth.
What if the aerial roots get too long or messy?
Tuck them into the pole or the soil.
If a root dries and turns brittle, you can trim it. But keep healthy, active roots—they’re the secret to big leaves and faster growth.
Is a moss pole necessary for fenestrations?
Not strictly. Age, light, and overall health drive fenestrations.
But a pole accelerates everything by supporting vertical growth and offering moisture to aerial roots. You’ll see bigger, more dramatic leaves sooner with a pole.
Conclusion
Give your Monstera something real to climb, keep that pole evenly moist, and guide the aerial roots like a plant coach. Add bright light, a chunky mix, and steady feeding, and you’ll get the magazine-cover leaves everyone wants.
It’s not magic—just the right support system and a little consistency. Now go raise that jungle.