Simple Cake Designs That Look Bakery-Level Without Wrecking Your Weekend
You don’t need a culinary degree or a $300 toolkit to make a cake that makes people gasp and ask, “Wait, you made that?” You need a simple base, a handful of smart decorating moves, and the confidence to own it. Today, we’re turning “plain cake” into “Instagram bait” with techniques so easy you’ll wonder why you ever bought store-bought frosting roses. This is the blueprint for gorgeous, low-stress, simple cake designs that actually taste amazing.
Ready to make something that looks pro but takes less time than your favorite show’s episode?
Why This Recipe Works
Foundational flavor first: A moist vanilla butter cake is the ultimate blank canvas—neutral enough to pair with any design or filling, but rich and tender so it never feels basic.
One-bowl batter, fewer dishes: Creaming butter and sugar builds structure and lift while keeping steps approachable and repeatable for consistent results.
Sturdy, smooth buttercream: American buttercream is fast, pipe-able, and stable, which means clean edges, sharp textures, and designs that hold up in real life, not just on Pinterest.
Scalable + flexible: This base works for a sheet cake, rounds, or cupcakes, and the design ideas slot in no matter the size. Minimal tools, maximum effect.
What Goes Into This Recipe – Ingredients
- For the Vanilla Cake:
- 2 1/2 cups (300 g) all-purpose flour
- 2 1/2 tsp baking powder
- 1/2 tsp fine salt
- 1 cup (226 g) unsalted butter, room temperature
- 1 1/2 cups (300 g) granulated sugar
- 4 large eggs, room temperature
- 1 tbsp pure vanilla extract
- 1 cup (240 ml) whole milk, room temperature
- For the American Buttercream:
- 1 cup (226 g) unsalted butter, room temperature
- 3 1/2–4 cups (420–480 g) powdered sugar, sifted
- 1–3 tbsp heavy cream or milk
- 1 tsp vanilla extract
- Pinch of salt
- Optional Fillings/Toppings:
- Fruit jam or curd (strawberry, lemon, raspberry)
- Sprinkles, cocoa powder, or shredded coconut
- Fresh berries or edible flowers
- Chocolate ganache (4 oz chocolate + 1/2 cup cream)
- Food coloring gels
Let’s Get Cooking – Instructions
- Prep and preheat: Heat oven to 350°F (175°C). Grease and line two 8-inch round pans or a 9×13-inch pan with parchment.
Set ingredients to room temp for smoother mixing.
- Whisk the dry: In a bowl, whisk flour, baking powder, and salt. This keeps your crumb even and avoids sad, dense pockets.
- Cream it: Beat butter and sugar on medium-high until pale and fluffy, 2–3 minutes. Add eggs one at a time, then vanilla.
Scrape the bowl. Don’t skip.
- Combine smartly: Add dry ingredients in three additions, alternating with milk, starting and ending with dry. Mix on low just until combined.
Overmixing = tough cake. No thanks.
- Bake: Divide batter evenly. Bake rounds 25–30 minutes (sheet cake 30–35), until a toothpick comes out with a few moist crumbs.
Cool 10 minutes in pan, then invert to cool fully.
- Make buttercream: Beat butter until creamy. Add powdered sugar in 2–3 additions with a pinch of salt. Stream in 1–3 tbsp cream to reach a spreadable texture.
Beat 1–2 minutes for fluff. Flavor with vanilla.
- Level and stack (if layering): Level domes with a serrated knife. Add a thin buttercream layer and optional jam in the middle.
Top with second layer.
- Crumb coat: Apply a thin layer of frosting to seal crumbs. Chill 15–20 minutes until set. This is your neatness hack.
- Final coat + design: Frost smoothly or go textured.
Pick one “simple cake design” below and own it.
Storage Instructions
- Room temperature: Covered cake keeps 1–2 days if your kitchen is cool (65–70°F). Avoid direct sun—melty frosting is not the vibe.
- Refrigerator: Store covered for up to 5 days. Bring to room temp 30–60 minutes before serving for best texture.
- Freezer: Wrap unfrosted layers tightly and freeze up to 2 months.
Thaw in the fridge overnight. Buttercream freezes well for 1 month; rewhip after thawing.
- Make-ahead: Bake layers a day early, wrap, and chill. Frost the next day for stress-free decorating.
Health Benefits
Mindful indulgence: A homemade cake means real ingredients, controlled sugar, and zero mystery additives.
You pick what goes in—power move, IMO.
Portion control built-in: One satisfying slice with balanced sweetness and fat keeps cravings in check better than ultra-processed sweets.
Customization for needs: Swap to lactose-free milk, reduce sugar slightly, or use a gluten-free flour blend if necessary. Still tasty, still celebratory.
Joy factor: Celebrations boost connection and mood. Baking for others?
That’s edible serotonin.
Common Mistakes to Avoid
- Cold ingredients: Cold butter and eggs don’t emulsify well, causing dense, uneven cake. Room temp is non-negotiable.
- Overmixing: Once flour is in, go gentle. Overworking develops gluten and toughens the crumb.
- Skipping the crumb coat: That thin first layer traps crumbs.
Without it, you’re chasing speckles forever. Don’t be that person.
- Wrong knife for leveling: Use a long serrated knife. Saw lightly; don’t press.
Gravity is not your friend here.
- Runny frosting: Too much liquid or warm butter makes slippy sides. Add more powdered sugar or chill 10 minutes, then rewhip.
- Overbaking: Dry cake is a trust breaker. Pull it when the center springs back and a toothpick has moist crumbs.
Different Ways to Make This
- Rustic swoops: Use an offset spatula to create bold, messy swooshes.
Finish with a ring of fresh berries or edible flowers. Zero piping skills required.
- Naked cake: Apply a thin frosting coat and scrape back to expose layers. Add powdered sugar dusting and a crown of fruit for minimalist chic.
- Sprinkle sides: Press rainbow sprinkles into the sides after the final coat.
It’s instant party mode and incredibly forgiving.
- Textured comb: Run a cake comb around the sides for ridges. Top with a simple piped border. Clean, modern, and fast.
- Ombré effect: Tint three bowls of buttercream from light to dark.
Frost bottom dark, middle medium, top light. Smooth for a gradient flex.
- Cocoa dust stencil: Lay a doily or stencil on top and sift cocoa or powdered sugar. Peel off for a lacy finish.
Fancy without effort—yes, please.
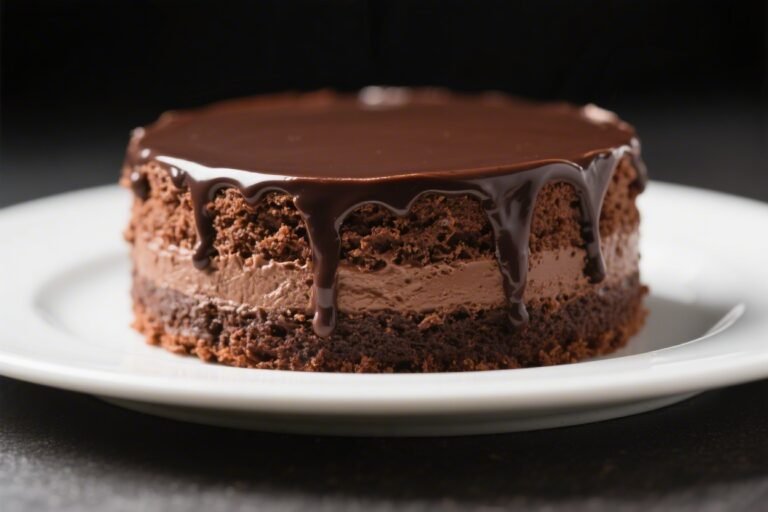
- Ganache drip: Pour cooled ganache on the edges and nudge drips with a spoon. Top with berries or chopped chocolate for drama.
- Coconut cloud: Coat the sides and top with shredded coconut. Add a few lime zest flecks for color pop.
Tropical and easy.
- Palette knife florals: Tint small amounts of buttercream and swipe petal shapes with a small spatula. Painterly effect, minimal precision.
- Sheet cake doodles: Pipe simple lines, dots, or waves across a flat sheet cake. Graphic, playful, and super quick, FYI.
FAQ
Can I make this without a stand mixer?
Yes.
A hand mixer works perfectly. Cream the butter and sugar a minute longer and scrape the bowl often for an even batter.
How do I keep the cake moist?
Don’t overbake, measure flour correctly (spoon and level), and consider brushing cooled layers with a light simple syrup if you need extra insurance.
What food coloring should I use?
Gel colors deliver strong hues without thinning the frosting. Start with a toothpick dab and build up slowly to avoid neon accidents.
Can I reduce the sugar in the buttercream?
Yes, slightly.
Use 3 to 3 1/2 cups powdered sugar and a pinch more salt. For less sweetness with great texture, try half American, half cream cheese frosting.
How do I get perfectly smooth sides?
Chill after crumb coat, apply a generous final layer, and use a bench scraper warmed under hot water, wiped dry. Spin the cake stand and let the scraper do the work.
What if I don’t have cake pans?
Use a 9×13-inch pan for a single-layer sheet cake.
It’s the easiest canvas for simple designs like sprinkles, stencils, or piped borders.
Can I make this gluten-free?
Yes. Use a 1:1 gluten-free baking flour with xanthan gum. Check doneness a few minutes early—GF cakes can brown faster.
How far ahead can I decorate?
Frosted cakes keep nicely 1 day ahead, covered and chilled.
Add fresh fruit or florals the day of serving to keep them perky.
Wrapping Up
Simple cake designs aren’t about perfection—they’re about smart moves that look pro and taste even better. With a reliable vanilla base, a quick buttercream, and a handful of easy styling tricks, you can ship bakery energy from your own kitchen. Pick one design, execute cleanly, and let the cake do the flexing.
Your guests will think you spent hours; you’ll know it was strategy over sweat. Now go claim your “Did you really make this?” moment.